sebastians site
Adventures in Open Source Hard and Software
Due to a recent set of interesting developments earlier this year,
$dayjob now revolves around energy efficient machine learning on embedded systems,
neural architecture search
and sometimes a bit of neuromorphic computing.
The only problem is: I don't know anything about machine learning.
To be fair: I know just enough to know what I don't know.
Fortunately for me, I don't need to know all the mathematical details for know.
While I would like to look into that at some point,
important for now are ML frameworks that I can use and best practises that I can stick to.
That will probably get me 80% of the way to where I want to be for now.
However, I also don't have any experience with those frameworks and the tooling that goes with them. In addition to that, a lot of the stuff I work with happens to run on a GPU cluster. This means I get to mess around with trying to keep NVIDIA drivers, the CUDA runtime, and what ever ML framework I'm using compatible to each other, while also cursing at conda and python virtual environments. Also, I don't have root access, so I can't just yeet everything and do a cleanish installation like all those stackoverflow posts tell me to do. What I need is a better understanding of the various components involved in that setup. Which component has to be compatible to what other component and how do they all interact, so that I can make my model identify all the cats in the image?
Of course, I did what any good hacker would do and tried to RTFM first.
Unfortunately this one of those occasions where this will only get you so far.
In reality any tech stack sufficiently deep will need some duct tape in form of
if x happens you can work around it by doing y.
That is arcane knowledge, which you can only obtain be messing around and finding out.
Traditionally, this means one of two things for me:
Either obtaining a working setup and repeatedly breaking it and fixing it until I understand what makes it tick,
or alternatively obtain the raw materials and build a working setup from scratch.
I decided to attempt the latter one, at home in my free time, because that meant I could mess around inefficiently and aimlessly until I find out, and also I could explore any weird fun tangents that I came across.
It's probably also worth pointing out, that is post is not a tutorial, it's just the written account of what I did and some of the issues I encountered along the way. You can try to follow along, but be prepared to do your own research and read through the prior art linked below.
So I've decided to build a GPU compute server for my home lab as a learning experience. It should at least be able to run some basic ML workloads, e.g. use easyocr to sort some photos from a mountain bike race by plate numbers, or use SentenceTransformers to build semantic search index over some documents (there is an ongoing side project, that you may or may not know about already, if you follow me on mastodon). Also, it would be interesting if it could run some decently sized LLMs locally, so that I can mess around with those without getting my API access revoked for trying weird stuff. (There is another blog post in the making, stay tuned.) If I'm going through the effort of building a dedicated system for ML stuff, I might as well go all the way.
Running LLMs is probably the more challenging one of those use cases. In my experience there are two major limiting factors for doing inference with larger models: Firstly, you need enough VRAM to load the model. Some runtimes let you get away with running only some layers of the LLM on the GPU, and running the rest on your CPU, but the performance is usually not that great. Even a slower, older GPU will give you more tokens per second, if you can fit the model into its VRAM. Secondly, the other limiting factor is the number and speed of your compute cores. Those numbers will pretty much determine how many tokes per second you can get out of the LLM. I don't care as much about speed. If it spits out tokens a bit faster than I can read them, it's probably fine for my experiments.
Armed with those constraints in mind I went looking for GPUs. Of course, I could have gone with some older consumer GPU. At the time of writing you can get a used GTX1080ti with 11GB with 11 TFLOP/s using FP32 for around 200€.
The question is: Can we do better than that for our application, if we look at old datacentre GPUs. Well... you can get a used Tesla K80 with 24GB and about 8 TFLOP/s for less than 100€. It's slower, but it has a lot of VRAM and you could get two of them for the price of one GTX1080ti. Also, it is no longer supported by the latest NVIDIA drivers, so it will only get cheaper, as you can't use them in any serious production setups any more. On top of that, making full use of the card can be a bit tricky, because it's actually a dual GPU setup build into a single card: You have two GPUs with 12GB of VRAM each. So whatever workload you intend to run has to have multi GPU support, to make full use of the card. In practise this does not matter too much, most modern machine learning frameworks support multi GPU setups anyway. You could even consider it an advantage, as you can run two smaller workloads independently, even if the workloads require exclusive access to a GPU. Another factor why they are so cheap is that a data centre GPU does not come with cooling fans. The server is supposed to provide a LOT of airflow to it to keep it cool. There is a bit of prior art on how to do that. There are even better solutions out there using 3D printed parts. You'll also need an adapter that takes the two more common 12V 8-pin connections for normal GPUs on your power supply and adapts them to the EPS-12V 8-pin connection NVIDIA uses for its workstation and datacentre GPUs. Remember what I said about messing around? Tangents are fun. Super janky setups are fun. There are also newer faster cards available that also have 24GB RAM e.g. the Tesla P40 or the Tesla M40. However those tend to be a lot more pricey, selling over 300€, and that's not exactly within my budget.
So after not enough thought I bought a K80 for 80€.

It's a reassuringly hefty piece of hardware. Also, it's a lot longer than it looks on photos. I didn't add a banana for scale, but just look at the PCIe connector.
Before buying more e-waste to build a system around the card, I wanted to quickly verify that it actually works. After all I just bought a piece of $5000 high-end hardware for less money, than my what I spent on my keyboard. Even if the hardware came out over 10 years ago and has lost software support, it still felt like getting scammed at that point. So I dug through my parts bin and found an old B85M-G motherboard with its i5-4440 still in the socket. I don't too much PC hardware tinkering any more, so that was the only board with PCIe that I had.

Excitedly I installed Debian 12.
Then I installed Debian 11 over the Debian 12 for reasons, that I'll explain in a bit.
(See I already learned something there.)
After I got the legacy NVIDIA driver installed and rebooted the system.... nothing happened.
Well ... not nothing.
nvtop told me I didn't have any compatible GPUs.
A quick check of dmesg revealed a whole bunch of issues:
[    0.155860] pnp 00:00: disabling [mem 0xfed40000-0xfed44fff] because it overlaps 0000:03:00.0 BAR 1 [mem 0x00000000-0x3ffffffff 64bit pref]
[    0.155864] pnp 00:00: disabling [mem 0xfed40000-0xfed44fff disabled] because it overlaps 0000:04:00.0 BAR 1 [mem 0x00000000-0x3ffffffff 64bit pref]
[    0.156822] pnp 00:08: disabling [mem 0xfed1c000-0xfed1ffff] because it overlaps 0000:03:00.0 BAR 1 [mem 0x00000000-0x3ffffffff 64bit pref]
[    0.156825] pnp 00:08: disabling [mem 0xfed10000-0xfed17fff] because it overlaps 0000:03:00.0 BAR 1 [mem 0x00000000-0x3ffffffff 64bit pref]
[    0.156826] pnp 00:08: disabling [mem 0xfed18000-0xfed18fff] because it overlaps 0000:03:00.0 BAR 1 [mem 0x00000000-0x3ffffffff 64bit pref]
[    0.156828] pnp 00:08: disabling [mem 0xfed19000-0xfed19fff] because it overlaps 0000:03:00.0 BAR 1 [mem 0x00000000-0x3ffffffff 64bit pref]
[    0.156829] pnp 00:08: disabling [mem 0xf8000000-0xfbffffff] because it overlaps 0000:03:00.0 BAR 1 [mem 0x00000000-0x3ffffffff 64bit pref]
[    0.156831] pnp 00:08: disabling [mem 0xfed20000-0xfed3ffff] because it overlaps 0000:03:00.0 BAR 1 [mem 0x00000000-0x3ffffffff 64bit pref]
[    0.156832] pnp 00:08: disabling [mem 0xfed90000-0xfed93fff] because it overlaps 0000:03:00.0 BAR 1 [mem 0x00000000-0x3ffffffff 64bit pref]
[    0.156834] pnp 00:08: disabling [mem 0xfed45000-0xfed8ffff] because it overlaps 0000:03:00.0 BAR 1 [mem 0x00000000-0x3ffffffff 64bit pref]
[    0.156835] pnp 00:08: disabling [mem 0xff000000-0xffffffff] because it overlaps 0000:03:00.0 BAR 1 [mem 0x00000000-0x3ffffffff 64bit pref]
[    0.156837] pnp 00:08: disabling [mem 0xfee00000-0xfeefffff] because it overlaps 0000:03:00.0 BAR 1 [mem 0x00000000-0x3ffffffff 64bit pref]
[    0.156838] pnp 00:08: disabling [mem 0xf7fdf000-0xf7fdffff] because it overlaps 0000:03:00.0 BAR 1 [mem 0x00000000-0x3ffffffff 64bit pref]
[    0.156840] pnp 00:08: disabling [mem 0xf7fe0000-0xf7feffff] because it overlaps 0000:03:00.0 BAR 1 [mem 0x00000000-0x3ffffffff 64bit pref]
[    0.156842] pnp 00:08: disabling [mem 0xfed1c000-0xfed1ffff disabled] because it overlaps 0000:04:00.0 BAR 1 [mem 0x00000000-0x3ffffffff 64bit pref]
[    0.156843] pnp 00:08: disabling [mem 0xfed10000-0xfed17fff disabled] because it overlaps 0000:04:00.0 BAR 1 [mem 0x00000000-0x3ffffffff 64bit pref]
[    0.156845] pnp 00:08: disabling [mem 0xfed18000-0xfed18fff disabled] because it overlaps 0000:04:00.0 BAR 1 [mem 0x00000000-0x3ffffffff 64bit pref]
[    0.156846] pnp 00:08: disabling [mem 0xfed19000-0xfed19fff disabled] because it overlaps 0000:04:00.0 BAR 1 [mem 0x00000000-0x3ffffffff 64bit pref]
[    0.156848] pnp 00:08: disabling [mem 0xf8000000-0xfbffffff disabled] because it overlaps 0000:04:00.0 BAR 1 [mem 0x00000000-0x3ffffffff 64bit pref]
[    0.156850] pnp 00:08: disabling [mem 0xfed20000-0xfed3ffff disabled] because it overlaps 0000:04:00.0 BAR 1 [mem 0x00000000-0x3ffffffff 64bit pref]
[    0.156851] pnp 00:08: disabling [mem 0xfed90000-0xfed93fff disabled] because it overlaps 0000:04:00.0 BAR 1 [mem 0x00000000-0x3ffffffff 64bit pref]
[    0.156853] pnp 00:08: disabling [mem 0xfed45000-0xfed8ffff disabled] because it overlaps 0000:04:00.0 BAR 1 [mem 0x00000000-0x3ffffffff 64bit pref]
[    0.156854] pnp 00:08: disabling [mem 0xff000000-0xffffffff disabled] because it overlaps 0000:04:00.0 BAR 1 [mem 0x00000000-0x3ffffffff 64bit pref]
[    0.156856] pnp 00:08: disabling [mem 0xfee00000-0xfeefffff disabled] because it overlaps 0000:04:00.0 BAR 1 [mem 0x00000000-0x3ffffffff 64bit pref]
[    0.156857] pnp 00:08: disabling [mem 0xf7fdf000-0xf7fdffff disabled] because it overlaps 0000:04:00.0 BAR 1 [mem 0x00000000-0x3ffffffff 64bit pref]
[    0.156859] pnp 00:08: disabling [mem 0xf7fe0000-0xf7feffff disabled] because it overlaps 0000:04:00.0 BAR 1 [mem 0x00000000-0x3ffffffff 64bit pref]
...
[    0.163732] pci 0000:00:01.0: BAR 15: no space for [mem size 0xc00000000 64bit pref]
[    0.163734] pci 0000:00:01.0: BAR 15: failed to assign [mem size 0xc00000000 64bit pref]
[    0.163737] pci 0000:00:01.0: BAR 14: assigned [mem 0xf1000000-0xf2ffffff]
[    0.163740] pci 0000:00:1c.0: BAR 14: assigned [mem 0xdf200000-0xdf3fffff]
[    0.163745] pci 0000:00:1c.0: BAR 15: assigned [mem 0xdf400000-0xdf5fffff 64bit pref]
[    0.163748] pci 0000:00:1c.0: BAR 13: assigned [io  0x2000-0x2fff]
[    0.163754] pci 0000:00:01.0: BAR 15: no space for [mem size 0xc00000000 64bit pref]
[    0.163755] pci 0000:00:01.0: BAR 15: failed to assign [mem size 0xc00000000 64bit pref]
[    0.163758] pci 0000:00:01.0: BAR 14: assigned [mem 0xf1000000-0xf2ffffff]
[    0.163761] pci 0000:00:1c.0: BAR 14: assigned [mem 0xdf200000-0xdf3fffff]
[    0.163766] pci 0000:00:1c.0: BAR 15: assigned [mem 0xdf400000-0xdf5fffff 64bit pref]
[    0.163768] pci 0000:01:00.0: BAR 15: no space for [mem size 0xc00000000 64bit pref]
[    0.163769] pci 0000:01:00.0: BAR 15: failed to assign [mem size 0xc00000000 64bit pref]
[    0.163771] pci 0000:01:00.0: BAR 14: assigned [mem 0xf1000000-0xf2ffffff]
[    0.163773] pci 0000:02:08.0: BAR 15: no space for [mem size 0x600000000 64bit pref]
[    0.163774] pci 0000:02:08.0: BAR 15: failed to assign [mem size 0x600000000 64bit pref]
[    0.163776] pci 0000:02:10.0: BAR 15: no space for [mem size 0x600000000 64bit pref]
[    0.163777] pci 0000:02:10.0: BAR 15: failed to assign [mem size 0x600000000 64bit pref]
[    0.163779] pci 0000:02:08.0: BAR 14: assigned [mem 0xf1000000-0xf1ffffff]
[    0.163780] pci 0000:02:10.0: BAR 14: assigned [mem 0xf2000000-0xf2ffffff]
[    0.163782] pci 0000:03:00.0: BAR 1: no space for [mem size 0x400000000 64bit pref]
[    0.163784] pci 0000:03:00.0: BAR 1: failed to assign [mem size 0x400000000 64bit pref]
[    0.163785] pci 0000:03:00.0: BAR 3: no space for [mem size 0x02000000 64bit pref]
[    0.163786] pci 0000:03:00.0: BAR 3: failed to assign [mem size 0x02000000 64bit pref]
[    0.163788] pci 0000:03:00.0: BAR 0: assigned [mem 0xf1000000-0xf1ffffff]
[    0.163800] pci 0000:04:00.0: BAR 1: no space for [mem size 0x400000000 64bit pref]
[    0.163802] pci 0000:04:00.0: BAR 1: failed to assign [mem size 0x400000000 64bit pref]
[    0.163803] pci 0000:04:00.0: BAR 3: no space for [mem size 0x02000000 64bit pref]
[    0.163804] pci 0000:04:00.0: BAR 3: failed to assign [mem size 0x02000000 64bit pref]
[    0.163806] pci 0000:04:00.0: BAR 0: assigned [mem 0xf2000000-0xf2ffffff]

...

[ 1089.302325] nvidia-nvlink: Nvlink Core is being initialized, major device number 244
[ 1089.302330] NVRM: loading NVIDIA UNIX x86_64 Kernel Module  470.256.02  Thu May  2 14:37:44 UTC 2024
[ 1089.537364] nvidia-modeset: Loading NVIDIA Kernel Mode Setting Driver for UNIX platforms  470.256.02  Thu May  2 14:50:40 UTC 2024
[ 1089.538951] [drm] [nvidia-drm] [GPU ID 0x00000300] Loading driver
[ 1089.538952] [drm] Initialized nvidia-drm 0.0.0 20160202 for 0000:03:00.0 on minor 1
[ 1089.539059] [drm] [nvidia-drm] [GPU ID 0x00000400] Loading driver
[ 1089.539060] [drm] Initialized nvidia-drm 0.0.0 20160202 for 0000:04:00.0 on minor 2
[ 1103.288634] NVRM: GPU 0000:03:00.0: RmInitAdapter failed! (0x22:0xffff:667)
[ 1103.288669] NVRM: GPU 0000:03:00.0: rm_init_adapter failed, device minor number 0
[ 1103.406608] NVRM: GPU 0000:03:00.0: RmInitAdapter failed! (0x22:0xffff:667)
[ 1103.406629] NVRM: GPU 0000:03:00.0: rm_init_adapter failed, device minor number 0
[ 1103.524304] NVRM: GPU 0000:04:00.0: RmInitAdapter failed! (0x22:0xffff:667)
[ 1103.524322] NVRM: GPU 0000:04:00.0: rm_init_adapter failed, device minor number 1
[ 1103.641921] NVRM: GPU 0000:04:00.0: RmInitAdapter failed! (0x22:0xffff:667)
[ 1103.642002] NVRM: GPU 0000:04:00.0: rm_init_adapter failed, device minor number 1
...
Apparently my GPU decided to go for a drink and there wasn't enough space at the bar...
I can relate to that.
Joking aside: RmInitAdapter failed! (0x22:0xffff:667) is the most ungooglable error message
I've encountered in a while.
Sure you find a lot of folks asking for help in the usual places.
And the diagnostics reach from you need a bios update, via your kernel is b0rken
to you probably damaged the PCIe slot while installing the card.
Similarly, the solutions are wild mix of reinstalled the OS, downgraded the driver, got a new card, got a new motherboard
and my all-time favourite: disabled the integrated NIC on the motherboard.
Ironically, this also means you can't just ask ChatGPT, Claude, Gemini and friends.
They'll just latch onto some of those wrong answers and keep repeating them back to you.
Not that I had especially high hopes for that approach in the first place.
So I had no choice, but to apply an ancient skill, passed down to me by previous generations of hackers:
Actually reading error messages and deducing what went wrong.
First something called pnp complains about overlapping BARs.
pnp in this context means Plug aNd Play.
Back before we had PCIe, we had PCI. Before that we had ISA.
If you've been touching computers long enough,
you'll remember setting up interrupts and IO space addresses using jumpers on your cards.
That wasn't fun at all and also quite easy to mess up.
So Intel and Microsoft came up with what we now call Legacy Plug and Play.
The TL;DR is that it was a standard for the BIOS and the OS to automatically negotiate those resource allocations for you.
Win95 was the first "Plug and Play OS" and Linux famously had problems with plug and play for quite while.
To be fair to Linux: It's not like Windows did such a great job
with autoconfiguring devices either.
Today that original standard isn't used any more, but the name stuck around in various places.
When PCI was standardised, somebody was smart enough to include the PCI configuration space such that the OS or the BIOS could just assign resources to the devices. Since most communication of those devices happens via memory mapped IO (basically the device pretends to be a piece of memory at a certain location), one of the most important bits of configuration is the base address and size of the memory region they can use. That can be configured through their Base Address Registers. (I know that's a gross oversimplification. Read the Wikipedia article for all the details.) So when the kernel complains about overlapping BARs it basically says that there is not enough address space to map all the memory regions needed to communicate with the device.
Now you might be thinking: Wait a second! Shouldn't those addresses be 64bit?
That card can't be using that much address space now, can it?
The answer to that is surprisingly no and no again.
To stay compatible with 32bit OSes each BAR can describe a region that is between 16 bytes and 2 gigabytes in size,
located below the 4 gigabyte address space limit.
There are also 64bit BARs, but your BIOS has to support them explicitly.
Since that breaks support for any 32bit OSes, it's usually an option called Above 4G or Above 4G decoding that you have to enable.
Unless your motherboard is so new, that it simply does not care about 32bit compatibility any more.
On the other hand if you are very unlucky, your BIOS was written with the assumption that going above 4G is not necessary for consumer level hardware.
Similar issues were not uncommon for some more exotic dual GPU setups.
While I know that I now, I did not know that back then. (Learned something again... see it's working.)
After messing around some more a BIOS update and some changes to kernel command line, I decided to ask around on the fediverse whether anyone had any suggestions. Clemens offered some pointers.
While following those leads I discovered helpful a post in the NVIDIA developers forum:
The K80 presents a large BAR to the system (for each device). Not all system BIOSes are capable of mapping (two of these) large BAR regions.
So okay pretty much exactly what I've been suspecting at this point.
I took another look at the blog post by Khalid Mammadov
and the other one by Thomas Jungblut
who both got their cards working in the end.
The first one used a ASROCK B550 motherboard, while the latter was using a MSI AX99A.
At that point I wrongly suspected that I'd need support for resizable BAR to make the card work.
All things considered that didn't sound quite right to me, as resizable BAR as a BIOS feature,
is much newer than the K80 itself.
When I shared my thoughts on the fediverse Clemens pointed out, that he is running a modern GPU in an old ThinkStation S30 without any problem. Following my line of reasoning that should not just work. The S30 is of a similar vintage than the K80, and it was certified by NVIDIA to run a dual 12GB Quadro K6000 cards... a setup that should be really similar to a single K80.
The S30 looked a good deal. I need a case for the setup anyway and if I could buy a decent case that fits the card, and also came with power supply, a CPU (Xeon E5-1620), some RAM (16GB), a small SSD (128GB) and motherboard, that actually works with the card, that would be ideal. I bought the cheapest Thinkstation S30 for 80€ of eBay. The chassis is scratched and dented, and it wouldn't boot right out of the package. Nothing reseating the RAM and CPU wouldn't fix though. Slight downside: It came with a NV310 that needs one of those weird y-splitter cables for DVI. Nothing another eBay excursion can't fix, but while I waited for the adapter to arrive, I installed an ancient GeForce card from my parts bin to have some form of display output.

When I booted the system for the first time, I got all the angry beeping imaginable during post. This is what experts commonly refer to as "not a good sign". However since the Thinkstation is a serious workstation for doing serious workstation-grade workstation work, it also has a proper BIOS, that will actually tell you what's wrong.

That's pretty much the same problem I had with my old setup.
However, the BIOS version installed on my S30 was from 2012.
The latest version on
Lenovo's website
is from 2017.
While there is a newer version from 2020 is for the type 435x, I've got a 0606.
Make sure to check your exact model before attempting an update.
According to the changelog in the zip file some intermediate version between the two had added Above 4G decoding.
As is usually the case, the BIOS update process was less than smooth:
I couldn't use the Windows tool for obvious reasons.
The update ISO provided for download wouldn't boot when dded on a USB-Stick.
While I would have had a USB CD drive, I didn't have any CD-Rs to write the ISO to.
So I ended up making a FreeDOS USB drive and
added the contents of the DOS BIOS updater zip file that Lenovo provides.
After that I just had to boot into FreeDOS, run the batch file, decline to change the machine's serial,
and wait for the progress bar to fill up.
One reboot later I could just activate the Above 4G decoding option in the BIOS
and the angry beeping stopped.
After that I duct-taped (it's an air duct, so using duct tape is fine) the radial fan back to the card. I also propped the fan up on some random workbench detritus that I hotglued into the chassis, so it's not like I used duct tape in a load-bearing situation. A conveniently placed spare fan connector for front chassis fans on the motherboard can be used to supply it with power.
You might have already noticed, the word just is doing some very heavy lifting in this heading.
I started out trying to install Debian 12, as my reasoning was that stuff included with Debian is old enough,
that I could just install the 470.256.02 NVIDIA driver (last driver to still support the card).
Since the driver was not in the repos, I had to use the NVIDIA-Linux-x86_64-470.256.02.run installer,
that you can download from here.
Similarly, to get a compatible CUDA runtime you need CUDA 11.4.0 470.42.01,
which is just new enough to allow things like __device__ variables to be constexpr.
I don't know exactly what that means, but if you want to compile llama.cpp or ollama, you need it.
This version is also just old enough to work with the driver that still supports the K80.
The CUDA installer file is called cuda_11.4.0_470.42.01_linux.run and you can download it from
here.
There's only one slight problem with that: This CUDA version does not like any GCC newer than GCC 10.
You can convince the installer to do its thing it regardless if you use the --override parameter.
Unfortunately the resulting installation won't work:
$ cmake -B build -DCMAKE_CUDA_COMPILER:PATH=/usr/local/cuda/bin/nvcc

[...]

-- Using CUDA architectures: native
CMake Error at /usr/share/cmake-3.25/Modules/CMakeDetermineCompilerId.cmake:739 (message):
  Compiling the CUDA compiler identification source file
  "CMakeCUDACompilerId.cu" failed.

  Compiler: /usr/local/cuda/bin/nvcc

[...]

  /usr/local/cuda/bin/../targets/x86_64-linux/include/crt/host_config.h:139:2:
  error: #error -- unsupported GNU version! gcc versions later than 10 are
  not supported! The nvcc flag '-allow-unsupported-compiler' can be used to
  override this version check; however, using an unsupported host compiler
  may cause compilation failure or incorrect run time execution.  Use at your
  own risk.

    139 | #error -- unsupported GNU version! gcc versions later than 10 are not supported!
            The nvcc flag '-allow-unsupported-compiler' can be used to override this version check;
            however, using an unsupported host compiler may cause compilation failure or
            incorrect run time execution. Use at your own risk.
        |  ^~~~~

  # --error 0x1 --
Injecting the -allow-unsupported-compiler flag into all the nvcc calls through several layers
of build systems is really messy and ultimately results in binaries that just crash
as soon as they try to do anything with the GPU.
Of course, I tried just building GCC 10 and using it in the build process.
That resulted in an even bigger mess.
Since Debian 12 wouldn't work, I decided to try Debian 11.
It actually comes with gcc 10.2.1.
Furthermore, Debian 11 comes with nvidia-tesla-470-driver,
which is exactly the 470.256.02 I need.
This is not an entirely future-proof plan though:
It's 2025 and Debian 11 won't be EOL until the end of August 2026.
So while I can get a bit over a year of use out of it, I need to come up with a different solution long term.
I have some ideas involving nix for that, but those will have to wait for now.
The driver is in the non-free repos, so those need to be enabled.
After that it should just install using apt update && apt install nvidia-tesla-470-driver nvtop.
If you look into dmesg, the driver will complain about the NV310 being unsupported.
That's not a problem for me, as I don't intend to the system as a headless sever anyway.
If you want to actually run a graphical user interface on the machine itself,
you'll have to figure out how to get the original NVIDIA driver and nouveau to coexist.
That's an entirely different can of worms, that I would like to avoid for now.
The CUDA runtime in the Debian repos is 11.2.2,
which is a few minor versions too old to do anything useful with.
As I've already explained 11.4 is the minimum version needed for most things these days.
The good thing is that the cuda_11.4.0_470.42.01_linux.run installer,
will just install without complaints on Debian 11.
Once that is done you can use nvtop or nvidia-smi to marvel at your datacentre GPU setup.

Also pay no attention to the bench top power supply. I took this photo before I found the front chassis fan connector.
The heading is unfortunately not some new slang the kids use on TikTok. Yolo (you only look once) is a computer vision model by a company called Ultralitics (they really shouldn't be allowed to name stuff). There are specialized models for various tasks, e.g. for detection, which is computer-vision-speak for identifying objects of certain classes (e.g. dog or car) in an image as well as providing bounding box coordinates for each identified object. Yolo is interesting from an architectural point of view, as it was one of the first model for vision tasks, that functioned without any recurrent connections. This means it is purely feed forward from one layer to the next and will be done after a single forward pass, making it not only fast but also a lot easier to train. The model is open source and can be found in the ultralytics GitHub repo. In addition to the model itself, the repo also contains some high level tooling, to train it on different datasets. E.g. you could easily train it to spot trucks and planes in aerial imagery using the DOTA dataset. Since this is an unambiguously purely civilian application for counting vehicles, I'd rather stick to the COCO dataset for this example.
To start we need a python virtual environment with the correct version of pytorch and the ultralitics tools installed:
$ mkdir yolo
$ cd yolo/
$ python3 -m venv .venv
$ source .venv/bin/activate
$ pip install --upgrade pip
$ pip install install torch torchvision torchaudio --index-url https://download.pytorch.org/whl/cu118
$ pip install ultralytics
It's important to use the special URL https://download.pytorch.org/whl/cu118.
The prebuild wheel pip will download if you just use the defaults,
will be built for CUDA 12.something and won't work with our more vintage environment.
Once everything is installed (downloading will probably take a moment, go get some snacks),
we can use the yolo tool to verify our installation:
$ yolo checks
Ultralytics 8.3.146 🚀 Python-3.9.2 torch-2.6.0+cu118 CUDA:0 (Tesla K80, 11441MiB)
Setup complete ✅ (8 CPUs, 15.6 GB RAM, 128.9/232.7 GB disk)

OS                  Linux-5.10.0-34-amd64-x86_64-with-glibc2.31
Environment         Linux
Python              3.9.2
Install             pip
Path                /home/sebastian/yolo/.venv/lib/python3.9/site-packages/ultralytics
RAM                 15.57 GB
Disk                128.9/232.7 GB
CPU                 Intel Xeon E5-1620 0 3.60GHz
CPU count           8
GPU                 Tesla K80, 11441MiB
GPU count           2
CUDA                11.8

numpy               ✅ 2.0.2>=1.23.0
matplotlib          ✅ 3.9.4>=3.3.0
opencv-python       ✅ 4.11.0.86>=4.6.0
pillow              ✅ 11.2.1>=7.1.2
pyyaml              ✅ 6.0.2>=5.3.1
requests            ✅ 2.32.3>=2.23.0
scipy               ✅ 1.13.1>=1.4.1
torch               ✅ 2.6.0+cu118>=1.8.0
torch               ✅ 2.6.0+cu118!=2.4.0,>=1.8.0; sys_platform == "win32"
torchvision         ✅ 0.21.0+cu118>=0.9.0
tqdm                ✅ 4.67.1>=4.64.0
psutil              ✅ 7.0.0
py-cpuinfo          ✅ 9.0.0
pandas              ✅ 2.2.3>=1.1.4
ultralytics-thop    ✅ 2.0.14>=2.0
It even found the GPUs first try.
Now we can simply use the yolo tool to train a model from scratch:
$ yolo train data=coco.yaml model=yolo11n.yaml

[...]

  File "/home/sebastian/yolo/.venv/lib/python3.9/site-packages/torch/nn/modules/module.py", line 1750, in _call_impl
    return forward_call(*args, **kwargs)
  File "/home/sebastian/yolo/.venv/lib/python3.9/site-packages/torch/nn/modules/conv.py", line 554, in forward
    return self._conv_forward(input, self.weight, self.bias)
  File "/home/sebastian/yolo/.venv/lib/python3.9/site-packages/torch/nn/modules/conv.py", line 549, in _conv_forward
    return F.conv2d(
RuntimeError: cuDNN error: CUDNN_STATUS_NOT_SUPPORTED_ARCH_MISMATCH
Unless we can't. That's not-good™. cuDNN is a library of primitives for deep neural networks, which is used by pytorch, which is used by the yolo tooling. The support matrix for cuDNN, does not list anything below the Maxwell GPU architecture with compute capability 5.0. Our card has a Kepler chip with compute capability 3.5 ... which is a bit older than 5.0. The good news is that this table inexplicitly only shows versions 9.something. So after doing some digging, I found out that cuDNN version 8.7.0 still had support for Kepler cards.
Let's try again:
$ mkdir yolo
$ cd yolo/
$ python3 -m venv .venv
$ source .venv/bin/activate
$ pip install --upgrade pip
$ pip install install torch==2.3.1 torchvision torchaudio nvidia-cudnn-cu11==8.7.0.84 \
    --index-url https://download.pytorch.org/whl/cu118
$ pip install ultralytics
Let's see if it will run a DDP (distributed data parallel) training using both GPU devices with a slightly larger batch size:
$ yolo train data=coco.yaml model=yolo11n.yaml device=0,1 batch=64
[W NNPACK.cpp:61] Could not initialize NNPACK! Reason: Unsupported hardware.
Ultralytics 8.3.148 🚀 Python-3.9.2 torch-2.3.1+cu118 CUDA:0 (Tesla K80, 11441MiB)
                                                      CUDA:1 (Tesla K80, 11441MiB)
engine/trainer: agnostic_nms=False, amp=True, augment=False, auto_augment=randaugment, batch=64,
[...]

                   from  n    params  module                                       arguments
  0                  -1  1       464  ultralytics.nn.modules.conv.Conv             [3, 16, 3, 2]
  1                  -1  1      4672  ultralytics.nn.modules.conv.Conv             [16, 32, 3, 2]
  2                  -1  1      6640  ultralytics.nn.modules.block.C3k2            [32, 64, 1, False, 0.25]
  3                  -1  1     36992  ultralytics.nn.modules.conv.Conv             [64, 64, 3, 2]
  4                  -1  1     26080  ultralytics.nn.modules.block.C3k2            [64, 128, 1, False, 0.25]
  5                  -1  1    147712  ultralytics.nn.modules.conv.Conv             [128, 128, 3, 2]
  6                  -1  1     87040  ultralytics.nn.modules.block.C3k2            [128, 128, 1, True]
  7                  -1  1    295424  ultralytics.nn.modules.conv.Conv             [128, 256, 3, 2]
  8                  -1  1    346112  ultralytics.nn.modules.block.C3k2            [256, 256, 1, True]
  9                  -1  1    164608  ultralytics.nn.modules.block.SPPF            [256, 256, 5]
 10                  -1  1    249728  ultralytics.nn.modules.block.C2PSA           [256, 256, 1]
 11                  -1  1         0  torch.nn.modules.upsampling.Upsample         [None, 2, 'nearest']
 12             [-1, 6]  1         0  ultralytics.nn.modules.conv.Concat           [1]
 13                  -1  1    111296  ultralytics.nn.modules.block.C3k2            [384, 128, 1, False]
 14                  -1  1         0  torch.nn.modules.upsampling.Upsample         [None, 2, 'nearest']
 15             [-1, 4]  1         0  ultralytics.nn.modules.conv.Concat           [1]
 16                  -1  1     32096  ultralytics.nn.modules.block.C3k2            [256, 64, 1, False]
 17                  -1  1     36992  ultralytics.nn.modules.conv.Conv             [64, 64, 3, 2]
 18            [-1, 13]  1         0  ultralytics.nn.modules.conv.Concat           [1]
 19                  -1  1     86720  ultralytics.nn.modules.block.C3k2            [192, 128, 1, False]
 20                  -1  1    147712  ultralytics.nn.modules.conv.Conv             [128, 128, 3, 2]
 21            [-1, 10]  1         0  ultralytics.nn.modules.conv.Concat           [1]
 22                  -1  1    378880  ultralytics.nn.modules.block.C3k2            [384, 256, 1, True]
 23        [16, 19, 22]  1    464912  ultralytics.nn.modules.head.Detect           [80, [64, 128, 256]]
YOLO11n summary: 181 layers, 2,624,080 parameters, 2,624,064 gradients, 6.6 GFLOPs

DDP: debug command /home/sebastian/yolo/.venv-cudnn/bin/python3 -m torch.distributed.run --nproc_per_node 2 --master_port 49269 /home/sebastian/.config/Ultralytics/DDP/_temp_mlfldkse139723384360912.py
Ultralytics 8.3.148 🚀 Python-3.9.2 torch-2.3.1+cu118 CUDA:0 (Tesla K80, 11441MiB)
                                                      CUDA:1 (Tesla K80, 11441MiB)
Freezing layer 'model.23.dfl.conv.weight'
AMP: running Automatic Mixed Precision (AMP) checks...
AMP: checks passed ✅
train: Fast image access ✅ (ping: 0.0±0.0 ms, read: 3248.7±450.6 MB/s, size: 148.8 KB)
train: Scanning /home/sebastian/yolo/datasets/coco/labels/train2017.cache... 117266 images, 1021 backgrounds, 0 corrupt: 100%|██████████| 118287/118287 [00:00<?, ?it/s]
val: Fast image access ✅ (ping: 0.0±0.0 ms, read: 3231.9±818.0 MB/s, size: 210.6 KB)
val: Scanning /home/sebastian/yolo/datasets/coco/labels/val2017.cache... 4952 images, 48 backgrounds, 0 corrupt: 100%|██████████| 5000/5000 [00:00<?, ?it/s]
Plotting labels to runs/detect/train5/labels.jpg...
optimizer: 'optimizer=auto' found, ignoring 'lr0=0.01' and 'momentum=0.937' and determining best 'optimizer', 'lr0' and 'momentum' automatically...
optimizer: SGD(lr=0.01, momentum=0.9) with parameter groups 81 weight(decay=0.0), 88 weight(decay=0.0005), 87 bias(decay=0.0)
Image sizes 640 train, 640 val
Using 8 dataloader workers
Logging results to runs/detect/train5
Starting training for 100 epochs...

      Epoch    GPU_mem   box_loss   cls_loss   dfl_loss  Instances       Size
      1/100      5.54G      3.606      5.751      4.234        481        640:
      27%|██▋       | 496/1849 [15:33<42:12,  1.87s/it]
Success! ... The yolo tool has downloaded about 25GB of training data and started training on both GPU devices.
It is even reasonably fast: 15:33<42:12, 1.87s/it.
About one hour per epoch.
Training for a little over 4 days on a single GPU is not actually that bad.
Let's do some very rough ballpark comparison to renting a GPU in the cloud:
Running on full blast, the K80 sips back about 300W.
Add another 100W for the rest of the system, and you end up with 0.4kW for about 100h.
That's 40kwh. Assuming about 0.26€ per kW/h that's about 10€.
That's equivalent to about 7h on a NVIDIA RTX™ 6000 card with about 91.06 TFLOP/s for FP32 at.
Assuming our initial 8 TFLOP/s figure, we can guestimate, that we will be
doing \(100 \cdot 60 \cdot 60s \cdot 8{{TFLOP}\over{s}} = 2,88 FLOP\) (or \(2.88 \cdot 10^{18}\) operations) during those 100h.
The RTX6000 should be able to do that in about 9h.
Of course this comparison is grossly oversimplified and glosses over a lot of details,
still this is probably why those K80s end up on eBay for less than 100€.
On a rainy Saturday morning, I was trying to work around,
before I had my coffee...
At least that's my excuse why I took NVIDIA's table at face value and forgot that cuDNN versions earlier than 9 existed.
The question then becomes: Can we run pytorch models on the GPU without cuDNN?
Of course, we can. If we just set torch.backends.cudnn.enabled = False,
pytorch will fall back to its own CUDA kernels and stop looking for cuDNN.
It will be slower, but it will work.
This means we can't use the yolo utility any more,
since there is no way to set that value from outside the python interpreter.
(Being able to control the backend from an environment variable would have been nice for this.)
Writing the script is not that hard:
import torch
torch.backends.cudnn.enabled = False

from ultralytics import YOLO

model = YOLO("yolo11n.yaml")

results = model.train(data="coco.yaml", epochs=10)

results = model.val()
print(results)
However, this approach has one big downside.
It works, but it can not just run on multiple GPUs any more.
Since our K80 is two GPUs in a trench coat, half of the card will sit idle.
While I can just call train like this: model.train(data="coco.yaml", epochs=10, devices=[0,1]),
and start the script, but suddenly we are back at CUDNN_STATUS_NOT_SUPPORTED_ARCH_MISMATCH.
This was very confusing to say the least, but ultimately it all comes down to janky software design,
a common problem in machine learning.
Looking closely at the DDP run log output you can spot this line:
python3 -m torch.distributed.run --nproc_per_node 2 --master_port 49269 ~/.config/Ultralytics/DDP/_temp_mlfldkse139723384360912.py.
So ultralytics creates a temporary script for DDP and uses that in place of my script.
Then it starts one instance of that script for each GPU device.
Sure enough looking at
ultralytics/utils/dist.py#L29
there is a python file generator.
It only captures some parameters and the trainer class from my original script.
So for the new python interpreters spawned as part of the DDP process torch.backends.cudnn.enabled is never set to False.
There is a workaround though.
We can add our own trainer class in its own trainer.py that sets up torch for us:
import torch

from ultralytics.models.yolo.detect import DetectionTrainer
from ultralytics.utils import DEFAULT_CFG

class CustomTrainer(DetectionTrainer):
    def __init__(self, cfg=DEFAULT_CFG, overrides=None, _callbacks=None):
        torch.backends.cudnn.enabled = False
        super().__init__(cfg=cfg, overrides=overrides, _callbacks=_callbacks)
Then we can just use that trainer and add some more glue code in the main script:
import os
from pathlib import Path

# Add the current directory to sys.path
current_dir = Path(__file__).resolve().parent
os.eviron["PYTHONPATH"] += ":" + current_dir

from trainer import CustomTrainer

def main():
    trainer = CustomTrainer(overrides={
        'data':'coco.yaml',
        'model': 'yolo11n.yaml',
        'batch': 128,
        'epochs': 10,
        'device':[0,1]
    })
    trainer.train()

if __name__ == "__main__":
    main()
The separate trainer.py and messing with os.eviron["PYTHONPATH"] are necessary,
because that code generator has some unfortunate assumptions built in.
It tries to generate the import for the trainer class using:
module, name = f"{trainer.__class__.__module__}.{trainer.__class__.__name__}".rsplit(".", 1)
If CustomTrainer is defined in your main script, module will just become __main__.
So from {module} import {name} turns into from __main__ import CustomTrainer,
which obviously won't work.
Also, if module contains the correct module name or module path,
it still assumes that newly spawned python interpreter can find the module.
That's also not trivially true, hence the messing around with os.eviron["PYTHONPATH"].
Not the best helper around pytorchs DDP feature I've run into, but also not the worst.
In the end, if you can ignore all that jank, you can train your yolo model without using cuDNN like this.
Since I teased it initially, we finally have to talk about running LLMs locally. I'm rather opposed to using anything GenAI for obvious reasons (the ethics and consent issues with training data, the click-workers slaving away cleaning up the training data, the energy consumption, the fact that most usecases revolve around lowering the wages for artists, writers, translators and software developers, while CEOs get bonuses for deploying AI). However, the technology exists and has real implication for our daily lives. Therefore, it can be worthwhile investing the time to understand it and learning its failure modes.
There is also the security research aspect: Since everyone seems to be using retrival augmented generation on all their files and a model ccontext protocol sever for all their software, there is quite a bit of new attack surface on a typical developer's machine. To make matters worse that attack surface can potentially be accessed by a clever prompt injection. Lots of room for fun activities, lots of fun new ways to accidentally leak your private keys.
In any case it's a good idea to experiment locally. Not only can you control the entire stack and inspect the internal state of all components, there is also no one who can kick you out for poking around. I've already had my API access revoked from one model provider for trying interesting stuff.
While you could just run LLMs from a python script using TensorFlow or pytorch, that would be a lot of fiddly work which ultimately would not get you very far. To do anything useful with the model, e.g. hooking it up to something like continue or tmuxai you want an OpenAI-compatible or ollama-compatible API. Even those APIs are not too hard to implement, it's much more convenient to just use one of the common LLM runtimes.
The most common choice is ollama.
It's basically a wrapper around llama.cpp written in go.
The reason it became much more popular than the original llama.cpp is,
that it comes with a docker like interface.
You can simply type ollama run deepseek-r1:70b and it will download the model for you,
figure out if it can use your GPU and finally start a chat session with the model in your terminal.
Unfortunately ollama does not support older GPUs.
There is a fork, but it is very outdated by now.
It will not run some of the newer models, especially those based on the qwen architecture.
Since many of the smaller distilled model use qwen as their base, your choice is limited to mostly older models.
Fortunately for us, the development of llama.cpp didn't stop in the meantime. It now can download models from the same repository used by ollama, and it can still run on a Tesla K80 as pointed out by this really helpful GitHub issue.
Using the magic incantations provided by ChunkyPanda03 we can build working version of llama.cpp:
git clone https://github.com/ggml-org/llama.cpp.git
cmake -B build -DGGML_CUDA=ON -DCMAKE_CUDA_COMPILER=/usr/local/cuda-11.4/bin/nvcc \
    -DCMAKE_CUDA_ARCHITECTURES='37'
cd build/
make -j 16
To verify it works we can just download and run deepseek-r1.
./bin/llama-run -ngl 80 deepseek-r1:32b

The -ngl part specifies the number of layers to run on the GPU.
You'll want to tune that for each model you run.
Basically you can increase until your model just about fills the memory on your GPU.
The remainder of the model is then run on the CPU,
which fortunately is just about fast enough in my machine, that it does not become too much of a bottleneck.
To start an OpenAI compatible API server you can simply use llama-server which takes similar arguments to llama-run.
There you have it: AI at home.
Published: 29.06.2025 17:25 Updated: 29.06.2025 17:25The HAM radio research group at the University Kaiserslautern runs the aerospectator, a public dump1090 instance. It has been first installed by a student as part of their seminar paper and has been kept running by the group ever since. Somewhere in 2019 I inherited the maintenance of the setup, because part of my professional skill set is prodding and poking Raspberry Pis to make them run reliably (I work on an embedded linux distro for CM3 and CM4 based hardware platforms). Also, everyone else was just getting frustrated by having to climb on the roof every few months to replace the SD-card.

One of my first changes was to create an ansible playbook to simply redeployment. I also added a piwatcher as hardware watchdog, to reset the old slightly underpowered Pi1 if it got stuck.
Fast-forward a couple of years: At some point in 2023 we decided to switch as much of the groups systems over to nixos and make them deployable with colmena. That setup proved less fragile than a wild mix debian versions with ansible. However, it also meant that we needed to get nix running on a Pi1 (with 23.05 that was not too complicated) and we needed to cross-compile everything all the time for that one system. However since we rarely changed the config for that system, it was workable. The piwatcher was a bit of challenge, but after learning how to wrap its userspace-tool and the necessary system configs into a flake it just worked.
While updating to 24.04 I was unfortunately unable to keep the cross compilation for the Pi1 working. After a lengthy, yet ultimately unsuccessfully, adventure in the engine room of nixos, it was decided to upgrade it, since Pi3 hardware is so cheap, that replacing the tired old Pi1 is probably the better option. It also enabled us to use aarch64 nixos caches, which meant a lot less cross-compiling.
I whipped up a quick config to generate a custom SD-card image with all our "usual stuff", and especially the tools to feed our watchdog, preinstalled.
1 {
2 description = "Build raspi 3 bootstrap images";
3 inputs = {
4 nixpkgs.url = "github:nixos/nixpkgs/nixos-24.05";
5 piwatcher.url = "git+ssh://forgejo@ourserver:/piwatcher.git";
6 };
7 outputs = { self, nixpkgs }:
8 let
9 pkgs = nixpkgs.legacyPackages.x86_64-linux;
10 pkgs_aarch64 = nixpkgs.legacyPackages.aarch64-linux;
11 in
12 {
13 formatter.x86_64-linux = pkgs.nixpkgs-fmt;
14 nixosConfigurations.rpi3 = nixpkgs.lib.nixosSystem {
15 modules = [
16 "${nixpkgs}/nixos/modules/installer/sd-card/sd-image-aarch64.nix"
17 {
18 nixpkgs.config.allowUnsupportedSystem = true;
19 nixpkgs.hostPlatform.system = "aarch64-linux";
20
21 imports = [
22 piwatcher.nixosModules.default
23 ];
24
25 # Stolen from nixos-hardware/blob/master/raspberry-pi/3/default.nix
26 boot.kernelPackages = pkgs_aarch64.linuxPackages_rpi3;
27 nixpkgs.overlays = [
28 (final: super: {
29 makeModulesClosure = x:
30 super.makeModulesClosure (x // { allowMissing = true; });
31 })
32 ];
33
34 services.openssh.enable = true;
35 users.users.root.openssh.authorizedKeys.keys = [
36 # Add keys here...
37 ];
38
39 # Talk to watchdog, to disable it
40 services.piwatcher = {
41 enable = true;
42 default-timeout = 0;
43 wakeup-timer = 0;
44 timeout = 0;
45 package = piwatcher.packages.x86_64-linux.cross-aarch64-linux;
46 };
47
48 environment.systemPackages = with pkgs_aarch64; [
49 i2c-tools
50 dtc
51 ];
52
53 system.stateVersion = "24.05";
54 }
55 ];
56 };
57 images.bootstrap-rpi3 =
58 self.nixosConfigurations.rpi3.config.system.build.sdImage;
59 };
60 }
And that's when I hit a really annoying roadblock.
The piwatcher flake wasn't working any more.
The Pi kept getting power cycled by the watchdog.
However after some investigation I noticed the piwatcher tool was working fine.
It just couldn't talk to the hardware.
There was no I2C device under /dev.
dmesg and lsmod both show i2c-dev is loaded and doing something.
So it must be a device tree issue.
On a regular Pi I'd set dtparam=i2c_arm=on in /boot/config.txt and the bus should magically appear after a reboot.
So ... what's the nixos way of doing that? There's got be an option for that!
Turns out there is boot.loader.raspberryPi.firmwareConfig.
It's description states These options are deprecated, unsupported, and may not work like expected.,
which is probably true as it does not change my config.txt at all.
The config.txt is generated by nixos is actually pretty generic and bare-bones:
1 [pi3]
2 kernel=u-boot-rpi3.bin
3
4 [pi02]
5 kernel=u-boot-rpi3.bin
6
7 [pi4]
8 kernel=u-boot-rpi4.bin
9 enable_gic=1
10 armstub=armstub8-gic.bin
11
12 # Otherwise the resolution will be weird in most cases, compared to
13 # what the pi3 firmware does by default.
14 disable_overscan=1
15
16 # Supported in newer board revisions
17 arm_boost=1
18
19 [cm4]
20 # Enable host mode on the 2711 built-in XHCI USB controller.
21 # This line should be removed,
22 # if the legacy DWC2 controller is required
23 # (e.g. for USB device mode) or if USB support is not required.
24 otg_mode=1
25
26 [all]
27 # Boot in 64-bit mode.
28 arm_64bit=1
29
30 # U-Boot needs this to work,
31 # regardless of whether UART is actually used or not.
32 # Look in arch/arm/mach-bcm283x/Kconfig
33 # in the U-Boot tree to see if this is still
34 # a requirement in the future.
35 enable_uart=1
36
37 # Prevent the firmware from smashing the framebuffer
38 # setup done by the mainline kernel
39 # when attempting to show low-voltage or
40 # overtemperature warnings.
41 avoid_warnings=1
Just editing config.txt to bypass nix also didn't help.
I added dtparam=i2c_arm=on and it didn't make a difference.
But since we are already looking at FIRMWARE partition, do you notice something?
There are a lot of dbt files, but they all have pi4 and cm4 in their name.
Where's the devicetree file for the Pi3?
$ ls
armstub8-gic.bin      bootcode.bin  fixup4db.dat  start.elf start_cd.elf
bcm2711-rpi-4-b.dtb   config.txt    fixup4x.dat   start4.elf  start_db.elf
bcm2711-rpi-400.dtb   fixup.dat     fixup_cd.dat  start4cd.elf  start_x.elf
bcm2711-rpi-cm4.dtb   fixup4.dat    fixup_db.dat  start4db.elf  u-boot-rpi3.bin
bcm2711-rpi-cm4s.dtb  fixup4cd.dat  fixup_x.dat   start4x.elf u-boot-rpi4.bin
This, dear reader, is the point where my professionally experience in messing around with raspis comes into play. Seems like you've just won a little sidebar rant about devicetrees and how to get them into the linux kernel.
Traditionally on x86 and similar platforms the linux kernel would use BIOS, or these days UEFI interfaces to discover important hardware such as storage devices, network cards, videos cards, buses like USB. Your typical ARM SoC don't have a BIOS or UEFI (unless you are lucky enough to get to enjoy UEFI on aarch64). Instead, a devicetree is provided to the kernel as binary blob, somewhere in the RAM. The tree basically is a binary serialized representation of all the buses and attached peripherals, as well as some necessary setup parameters for your SoC. Usually, the devicetree is loaded by the bootloader along with the kernel and the initial ramdisk.
However, on the Raspberry Pi things can get a bit complicated, especially if there's a second stage bootloader like u-boot involved.
Normally without a second stage bootloader, the first stage bootloader embedded in the Pis ROM looks for the
first FAT32 formatted partition on the SD-Card, or in case of a compute module the onboard eMMC,
and load the file bootcode.bin from there.
There are also (presumably) newer versions of the bootloader that can boot from FAT16 as well,
but you never know which version you end up with on a Pi3.
The bootcode.bin is then execute by the "VideoCore GPU".
Yes that's right the GPU bootstraps the CPU. Somebody at Broadcom thought this was a sensible way of doing things.
This has some funny lesser known side effects, e.g. the overclocking the GPU,
but not the CPU can speed up boot times,
in a headless setup.
The Pi4 and Pi5 appear to load this code from an EEPROM instead.
After that continues to load start.elf, which brings up the actual ARM core,
reads config.txt, prepares a device tree and finally hands the execution over to the kernel.
See the official documentation for more info.
If u-boot is used a second stage bootloader, then u-boot.bin pretends to be the linux kernel, so that it can be executed by start.elf.
U-boot much like the linux kernel, needs to know to access the SoC peripheral,
e.g. mass storage to load the actual OS, a UART to display the display its console, or a network interface to perform a network boot.
For that it also needs a device tree.
On Pi3 and older u-boot has two possible sources for that:
It can use the device tree conveniently provided by the Raspberry Pi bootloader.
Alternatively, it can have its own devicetree, which is embedded into it during compilation.
After that it can forward one of those two trees to the kernel, or it can load a third tree from storage forward that one to the kernel.
On Pi4 and Pi5 things are little more complicated. Parameters like memory parameters and video timings are read from a ROM by the Raspberry Pi bootloader and added to the initial devicetree. This means all stage following the first stage bootloader have to reuse that devicetree, otherwise the linux kernel in the last stage will fail boot properly in some cases. Fortunately, you can just instruct u-boot to use the tree provided in RAM by the Raspberry Pi bootloader and then have pass that tree on to the linux kernel.
And that's almost all that you need to know about devicetrees.
There is one more thing though: device tree overlays.
Overlays are fragments of a device trees that can be added on top of a full tree,
overwriting some of its properties.
They can be applied either by a bootloader, e.g. the Raspberry Pi bootloader using dtoverlay in your config.txt or by u-boot using the ftd apply command.
Alternatively, if you are feeling extra adventurous you can also apply an overlay to the device tree currently in use,
after the kernel has booted.
If for some reason you can not use overlays in your setup, you can also just merge a devicetree blob with some overlays
at compile time using a command line utility.
As I found out, there is no device tree file for the Pi3 in the FIRMWARE partition.
However, the booted Pi3 knows about its network card, USB works and there even a console on the HDMI port,
so evidently it gets a device tree from somewhere.
Using dtc we can even decompile it back into a text and look at it:
$ dtc -I fs /sys/firmware/devicetree/base

[ ... a bunch of warnings that I removed ]

/dts-v1/;

/ {
  #address-cells = <0x01>;
  model = "Raspberry Pi 3 Model B+";
  serial-number = "000000001d7c907a";
  #size-cells = <0x01>;
  interrupt-parent = <0x01>;
  compatible = "raspberrypi,3-model-b-plus\0brcm,bcm2837";

  fixedregulator_3v3 {
    regulator-max-microvolt = <0x325aa0>;
    regulator-always-on;
    regulator-min-microvolt = <0x325aa0>;
    regulator-name = "3v3";
    compatible = "regulator-fixed";
    phandle = <0x97>;
  };

  fixedregulator_5v0 {
    regulator-max-microvolt = <0x4c4b40>;
    regulator-always-on;
    regulator-min-microvolt = <0x4c4b40>;
    regulator-name = "5v0";
    compatible = "regulator-fixed";
    phandle = <0x98>;
  };

  memory@0 {
    device_type = "memory";
    reg = <0x00 0x3b400000>;
  };

  arm-pmu {
    interrupts = <0x09 0x04>;
    interrupt-parent = <0x18>;
    compatible = "arm,cortex-a53-pmu\0arm,cortex-a7-pmu";
  };

  thermal-zones {

    cpu-thermal {
      polling-delay = <0x3e8>;
      polling-delay-passive = <0x00>;
      thermal-sensors = <0x02>;
      phandle = <0x3c>;
      coefficients = <0xfffffde6 0x64960>;

      trips {
        phandle = <0x3d>;

        cpu-crit {
          temperature = <0x1adb0>;
          hysteresis = <0x00>;
          type = "critical";
        };
      };

      cooling-maps {
        phandle = <0x3e>;
      };
    };
  };

  soc {
    dma-ranges = <0xc0000000 0x00 0x3f000000 0x7e000000 0x3f000000 0x1000000>;
    #address-cells = <0x01>;
    #size-cells = <0x01>;
    compatible = "simple-bus";
    ranges = <0x7e000000 0x3f000000 0x1000000 0x40000000 0x40000000 0x1000>;
    phandle = <0x3f>;

  [...]

    i2c@7e804000 {
      pinctrl-names = "default";
      #address-cells = <0x01>;
      pinctrl-0 = <0x15>;
      interrupts = <0x02 0x15>;
      clocks = <0x08 0x14>;
      #size-cells = <0x00>;
      clock-frequency = <0x186a0>;
      compatible = "brcm,bcm2835-i2c";
      status = "disabled";
      reg = <0x7e804000 0x1000>;
      phandle = <0x2b>;
    };

  [...]

  };
};
There is a i2c@7e804000 in it, but messing around with config.txt didn't change anything about it,
therefore it can't be the tree loaded by the Raspberry Pi bootloader.
Similarly, if it were loaded by u-boot I'd expect a dtb file somewhere on the FIRMWARE partition.
At that point I was totally stuck and did something that I should have done in the beginning:
I looked at the u-boot article in the nixos wiki.
As it turns out u-boot has a feature called
Generic Distro Configuration Concept,
which replace the imperative u-boot bootscripts with a simpler config file.
The way this is set up in nixos, u-boot looks for a file called extlinux/extlinux.conf on
all partitions on all storage devices it can find.
The file is located in /boot/extlinux/extlinux.conf when looking at the bootet OS on the pi.
$ cat /boot/extlinux/extlinux.conf
# Generated file, all changes will be lost on nixos-rebuild!

# Change this to e.g. nixos-42 to temporarily boot to an older configuration.
DEFAULT nixos-default

MENU TITLE ------------------------------------------------------------
TIMEOUT 50

LABEL nixos-default
  MENU LABEL NixOS - Default
  LINUX ../nixos/1w09bbijmmcw0hw2m9w0vycnzpkswrmi-linux-6.1.63-stable_20231123-Image
  INITRD ../nixos/bcfkyw1mgp4ykpajw1cz6pbh1vag1ygv-initrd-linux-6.1.63-stable_20231123-initrd
  APPEND init=/nix/store/r1cbbp0kdzi3k8apcfnfsx7rqxgn923y-nixos-system-aerospectator-24.05pre-git/init loglevel=4
  FDTDIR ../nixos/ldxaavrzzc60izvc9q2mfqdfph76b8dw-device-tree-overlays
This tells u-boot where to find the kernel, the initrd and most importantly the devicetree.
And that's where I finally found the elusive bcm2837-rpi-3-b-plus.dtb that gets loaded for my Pi3.
$ ls -alh /boot/nixos/ldxaavrzzc*-device-tree-overlays/broadcom/
total 772K
dr-xr-xr-x 2 root root 4.0K Aug 10 11:47 .
dr-xr-xr-x 4 root root 4.0K Aug 10 11:47 ..
-r--r--r-- 1 root root  31K Aug 10 11:47 bcm2710-rpi-2-b.dtb
-r--r--r-- 1 root root  34K Aug 10 11:47 bcm2710-rpi-3-b-plus.dtb
-r--r--r-- 1 root root  33K Aug 10 11:47 bcm2710-rpi-3-b.dtb
-r--r--r-- 1 root root  31K Aug 10 11:47 bcm2710-rpi-cm3.dtb
-r--r--r-- 1 root root  32K Aug 10 11:47 bcm2710-rpi-zero-2-w.dtb
-r--r--r-- 1 root root  32K Aug 10 11:47 bcm2710-rpi-zero-2.dtb
-r--r--r-- 1 root root  54K Aug 10 11:47 bcm2711-rpi-4-b.dtb
-r--r--r-- 1 root root  54K Aug 10 11:47 bcm2711-rpi-400.dtb
-r--r--r-- 1 root root  38K Aug 10 11:47 bcm2711-rpi-cm4-io.dtb
-r--r--r-- 1 root root  55K Aug 10 11:47 bcm2711-rpi-cm4.dtb
-r--r--r-- 1 root root  51K Aug 10 11:47 bcm2711-rpi-cm4s.dtb
-r--r--r-- 1 root root  74K Aug 10 11:47 bcm2712-rpi-5-b.dtb
-r--r--r-- 1 root root  34K Aug 10 11:47 bcm2837-rpi-3-a-plus.dtb
-r--r--r-- 1 root root  34K Aug 10 11:47 bcm2837-rpi-3-b-plus.dtb
-r--r--r-- 1 root root  33K Aug 10 11:47 bcm2837-rpi-3-b.dtb
-r--r--r-- 1 root root  31K Aug 10 11:47 bcm2837-rpi-cm3.dtb
-r--r--r-- 1 root root  32K Aug 10 11:47 bcm2837-rpi-zero-2.dtb
-r--r--r-- 1 root root  54K Aug 10 11:47 bcm2838-rpi-4-b.dtb
Now I know that the devicetree is generated by nix somewhere and that it lives in the nix store,
along with the kernel.
That's pretty cool, because the FIRMWARE partition is usually not mounted and it's contents exist
out of the immutable world of the nix store.
It also means that there is no automatic way to update the FIRMWARE partition using nixos-rebuild
or in my case using colmena apply (at least none that I found, please do correct me on this).
However, with this setup only the bootloader lives in the firmware partition,
so I can update the kernel and the devicetree by just changing our configuration and reapplying it.
Moreover, it also means that the hardware.devicetree should just allow us to setup a overlay.
1 { config, pkgs, ... }: {
2 hardware.deviceTree.overlays = [
3 {
4 name = "enable-i2c";
5 dtsText = ''
6 /dts-v1/;
7 /plugin/;
8 / {
9 compatible = "brcm,bcm2837";
10 fragment@0 {
11 target = <&i2c1>;
12 __overlay__ {
13 status = "okay";
14 };
15 };
16 };
17 '';
18 }
19 ];
20 }
I don't want to go too much into the details of how overlays work,
but this snippet targets i2c1 which is just an alias for i2c@7e804000 from the devicetree snippet above
and flips the status property from disabled to okay.
That's all that dtparam=i2c_arm=on would do on a regular pi.
After applying the new config and rebooting, I suddenly have the missing device file. The piwatcher starts to work, and I could just do what any sane person would do, that is stop poking at it and enjoy that it finally works. Maybe touch some grass instead of computers for a change. Then again, a sane person would have not ended up in this situation in the first place. Let's see just how deep this rabbit hole actually is.
I've successfully set up an overlay. So the changes I made must be somewhere™ on that pi.
$ ls -R /boot/nixos/iclw8i0iwj7i0cdq34f48c29s1ianp4i-device-tree-overlays
/boot/nixos/iclw8i0iwj7i0cdq34f48c29s1ianp4i-device-tree-overlays:
broadcom  overlays

/boot/nixos/iclw8i0iwj7i0cdq34f48c29s1ianp4i-device-tree-overlays/broadcom:
bcm2710-rpi-2-b.dtb       bcm2710-rpi-zero-2-w.dtb  bcm2711-rpi-cm4-io.dtb
bcm2837-rpi-3-a-plus.dtb  bcm2837-rpi-zero-2.dtb    bcm2710-rpi-3-b-plus.dtb
bcm2710-rpi-zero-2.dtb    bcm2711-rpi-cm4.dtb       bcm2837-rpi-3-b-plus.dtb
bcm2838-rpi-4-b.dtb       bcm2710-rpi-3-b.dtb       bcm2711-rpi-4-b.dtb
bcm2711-rpi-cm4s.dtb      bcm2837-rpi-3-b.dtb       bcm2710-rpi-cm3.dtb
bcm2711-rpi-400.dtb       bcm2712-rpi-5-b.dtb       bcm2837-rpi-cm3.dtb

/boot/nixos/iclw8i0iwj7i0cdq34f48c29s1ianp4i-device-tree-overlays/overlays:
hat_map.dtb  overlay_map.dtb
That's ... odd. There is no enable-i2c.dto. There are no overlay files at all.
I could also trawl trough /nix using something like find /nix -iname *.dto ... or I could just take advantage of how nix works.
Looking the path it's clear there has to be a derivation called device-tree-overlays
somewhere in the nixpkgs repo.
I can just grep the entire repo for that string.
And bingo: pkgs/os-specific/linux/device-tree/default.nix#L28
1 { lib, stdenv, stdenvNoCC, dtc }: {
2 applyOverlays = (base: overlays': stdenvNoCC.mkDerivation {
3 name = "device-tree-overlays";
4 nativeBuildInputs = [ dtc ];
5 buildCommand = let
6 overlays = lib.toList overlays';
7 in ''
8 mkdir -p $out
9 cd "${base}"
10 find -L . -type f -name '*.dtb' -print0 \
11 | xargs -0 cp -v --no-preserve=mode --target-directory "$out" --parents
12
13 for dtb in $(find "$out" -type f -name '*.dtb'); do
14 dtbCompat=$(fdtget -t s "$dtb" / compatible 2>/dev/null || true)
15 # skip files without `compatible` string
16 test -z "$dtbCompat" && continue
17
18 ${lib.flip (lib.concatMapStringsSep "\n") overlays (o: ''
19 overlayCompat="$(fdtget -t s "${o.dtboFile}" / compatible)"
20
21 # skip incompatible and non-matching overlays
22 if [[ ! "$dtbCompat" =~ "$overlayCompat" ]]; then
23 echo "Skipping overlay ${o.name}: incompatible with $(basename "$dtb")"
24 elif ${if (o.filter == null) then "false" else ''
25 [[ "''${dtb//${o.filter}/}" == "$dtb" ]]
26 ''}
27 then
28 echo "Skipping overlay ${o.name}: filter does not match $(basename "$dtb")"
29 else
30 echo -n "Applying overlay ${o.name} to $(basename "$dtb")... "
31 mv "$dtb"{,.in}
32 fdtoverlay -o "$dtb" -i "$dtb.in" "${o.dtboFile}"
33 echo "ok"
34 rm "$dtb.in"
35 fi
36 '')}
37
38 done
39 '';
40 });
41 }
And there is it is on line 32.
The shell script that builds this derivation uses fdtoverlay
to apply all the overlays to the devicetree files at build time.
This means all overlays specified in my config will just be merged into bcm2837-rpi-3-b-plus.dtb while the derivation is build.
Finally, here's the short version:
config.txt will have any effect.FIRMWARE partition.bcm2837-rpi-3-b-plus.dtb and no *.dtbo files at all.Also check out aerospectator.amateurfunk.uni-kl.de if you want to know what is flying in and out of the biggest American air force base on foreign soil. (Of course you'll only see planes with an active ADS-B transponder, so it's mostly just the boring stuff).
Published: 15.09.2024 16:17 Updated: 15.09.2024 17:17After reading about PIClock4 a inter-microcontroller mutex on dangerousprototypes.com, I got curious about the actual implementation. It uses shift registers to pass a token in form of just a single bit around. Once the token arrives at a mcu that needs access to the resource, the mcu can stop the shifting. After having done whatever it needs the resource for, it can start the shifting again. Unfortunately the schematic files were down, so I had to ask for them. The marker of piclock told me that his project was just for fun and never intended for actual usage. Because of the huge amount of logic chips needed he suggested rather using a arduino/atmega328 to emulate the hardware in software. That's what got me thinking initially. Using a 32k flash mcu to emulate 9 logic ics, sounded terribly wasteful to me.
First idea: I could use a Attiny instead.
Advantages: I would not waste that much flash space.
Disadvantage: Attinys have only few IO-pins and therefore the amount of mcus that can be attached to the lock is limited.
So I was looking for a solution that allows a huge number of mcus, while needing no/not much additional hardware. At some point I got reminded of token ring networks, something I've never seen myself, because it's a rather old technique and at least for computer networks totally replaced by Ethernet. It's basic ideas is that the hosts pass a token from one to the next in a ring like topology. Once a host gets a token he is allowed to attach data to it while passing it on. This is very similar to the bit that gets shifted around in the piclock system, but it does not require a central piece of hardware controlling the whole process. That sounded just like the thing I wanted.
After googling for a while I found a few implementations for token passing on microcontrollers, but the majority of them were integrated in other projects and designed for a single usage scenario. At that point I started experimenting with an own implementation. It had easily configurable for different AVR mcus and applicable to various scenarios where multiple mcus access the same resource.
It's important to notice that I don't claim this to be a full featured library. Let's be honest, there not even enough lines of code to call this a program. I rather wanted to present the idea behind it, as well as providing a little reference implementation. So just think of this as a request for comments.
The basic idea is to implement a decentralized token passing mechanism, allowing multiple mcus to share access to a resource like external memory, a sensor or a communication interface of some kind. Each mcu has one of its IO Pins connected to the external interrupt pin e.g. INT0 of the next mcu. The last mcu in this chain has one of its IOs connected to the interrupt pin of the first one. This results in a ring topology as shown below.

When everything is powered up somebody has to have the token and the access initially. I called this special mcu master. It does whatever it needs to do with the resource and then pulls his IO-pin (called PYX in the drawing) high for 1us. Slave 1 will get interrupted because of the rising signal at his INT0. In his ISR he will check whether the rest of his program has requested access to the resource. This is done by simply checking a flag. If the flag is not set it will pass the token to slave 2 immediately in his ISR. Otherwise it will set a flag, signalling the program that it can now access the resource and leave the ISR. It's now up to the program to work with the shared resource for a while and to pass on the token. The next mcus will do exactly the same thing and the token will circulate in the ring infinitely.
At least theory. In praxis you'll sooner or later lose the token, simply because of murphys law. Imagine a mcu crashes, there is a power failure or a bad connection. Having lost the token, the system will get stuck since no one is allowed to access the shared resource. Every mcu waits for the token, that will never arrive. That's the point where a timeout might come handy. Using a timer of the master mcu it's easy to implement one. The timer gets reset every time the master gets the token back from the last mcu in the ring. If the token doesn't arrive in time, the master assumes that it was lost and pretends to have the token. The new token will be passed on and everything is hopefully working again. Still there is one pitfall in this approach, the timeout has to be chosen carefully. If the master sends a new token while another is still on the ring, to mcu will try to work with the resource, which is in fact the situation we are trying to avoid using lock. The best idea is to use a timeout that is at least 1,5 times as long, as the longest time a token need back to the master.
There are two ways of getting the source code :
git clone https://github.com/LongHairedHacker/avr-ringlockOnce you got the source, you'll want to adjust the configuration in include/ringlock.h.
The config is documented there and changing it should be pretty straight forward.
Using the makefile is a bit more complex then the usual make all.
There are some variables that need to be set :
LOCKROLE sets role of the mcu in the ring. Can be master or slave.AVRMCU sets the mcu. Can be atmega8 or atmega32.
If you want an other mcu add it in include/ringlock.hF_CPU set the frequency of the mcu in Hz.So if you want to build a slave for an Atmega8 with 8MHz call make ROLE=slave AVRMCU=atmega8 F_CPU=8000000 all.
Currently the source only supports Atmega32 as master or slave and Atmega8 as slave.
This can be changed by extending the configs in include/ringlock.h.
Once you have added a new mcu, it would be nice to send me patch so I can add it to the source.
Using the ringlock in your source code is simple, it boils down to 4 functions :
rl_init() sets up timers and portsrl_request_lock() tells the ISR to keep the tokenrl_have_lock() retuns 1 if the mcu has the lock, else 0rl_release_lock() releases the lock againSince this was a solution to which I didn't have a Problem I made one up: One ATmega32 (Master) and one Atmega8 (Slave) share the TXD line of a RS232 connection. I used the OpenBench LogicSniffer to measure the signals.

The and gate was in a HCF4081. If you set the TXD of the passive mcu to high-Z you won't need it, but I wanted the unmixed signals as well. The program used in this test is bundled with the sourcecode as main.c.
Here are all the signals in the jawis OLS client:

and a photo of my setup :

So that's all so far.
Have fun with this stuff and please don't waste an entire Atmega32 on locks.
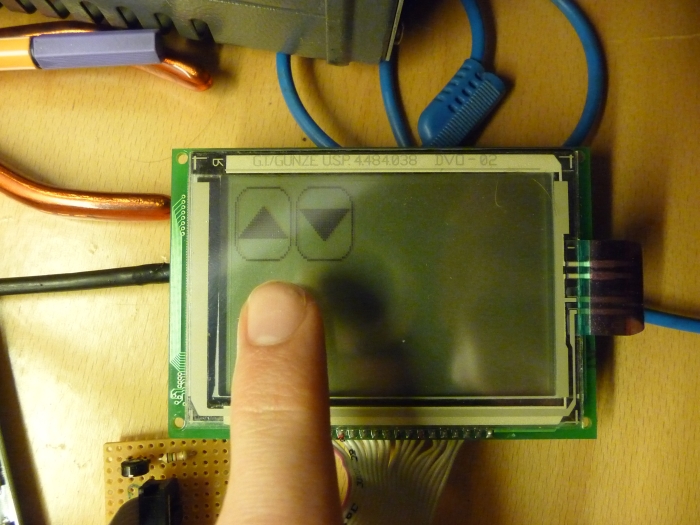
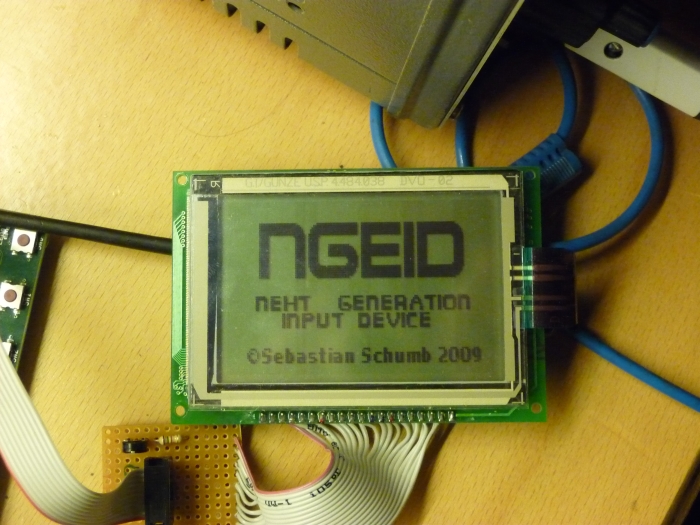
Published: 18.10.2011 20:36The information on this page is only for the DataVision DG-16080-11 lcd. It may apply to your lcd as well, but this also may not be the case. Be sure your read this page completely. It contains information about setting up the hardware which are not covered in the sourcecode documentation.
After discovering a quite cheap touchscreen lcd on the Roboternetz website I decided that such a display might be a useful addition to some of my projects. Therefore I bought some of them and started to write a C-library to use them with an ATmega32.
All the other librarys available missed some of the features I needed or they had some inefficient code.
The result was a small and quite flexible library for the lc7981-chip which is used by this display.
I can hear you say now : 'That's just like any other library out there. So where's the point in using yours ?'
The lc7981 has to ways of setting Pixels. The first is using it's set pixel command. The advantage of plotting a bitmap with this command is that you get a simple short sourcecode, and it is easy to place a bitmap anywhere you like on the screen. A big disadvantage of doing it this way is that you'll need to transfer 2byte per pixel. Plotting a 10x10px bitmap will result in 200 bytes of data being send. The other approach is to transfer a byte directly into the display memory. One byte represents 8 pixel of a display row. Using this approach, transferring the 10x10 bitmap will require 4 bytes per row, which results in 40 bytes in total. The major disadvantage is that it is difficult to place a bitmap on an X-coordinate that isn't a multiple of 8. My library uses the second approach in combination with some tricky bit shift operations to be able to plot a bitmap fast and at every X-ccordinate. It needs some more computing time, but I thinks it's a good trade-off.
My primary aim was the use the DataVision DG-16080-11 lcd, therefore I'll provide some info how I wired it up here. Using a plain lc7981 with some other lcd would be beyond the scope of this document. See the datasheet here for the display pinout. Connect each one of RS, RW and EN to a free pin of your controller. You'll have to specify the pins used in the lc7981.h. RES (Reset) has to be high and CS has to be low, so they have to be connected to Vcc and Gnd. The DB0-DB7 pins must be connect to one port of the AVR. Like for example PortB. Connect DB0 to PB0, DB1 to PB1 and so on. The Display supply voltage (pin 3) has to be connected to pin 17 and Gnd using a potentiometer. The potentiometer will be used to adjust the contrast.
The Versions below 0.6 beta were released under GPL. All newer versions including 0.6 and above are/will be realeased under MPL. I won't support the old GPLed versions anymore.
You may ask yourself why I changed my license. The answer is rather simple: I used GPL since it wanted my library to profit from bugs that get fixed and features that get written by other people who use it.
What I did not think about was the following scenario : Somebody uses my lib in an automated garden irrigation for his carrots. He does not change anything or adds any feature. He just uses my work, but he has to publish his source under GPL. I don't see any advantages in that. (Not that I don't like gardening or carrots, but I can't see a relation to my work here.) So I cause additional work for this poor guy and take away his freedom to chose an own license without any advantages for me, my work or him and his work. This is simply not what I intended to do in the first place
Okay, you might complain that I could have used LGPL instead of MPL.
But it's terms are rather unclear to me and the rule of thumb with dynamic and static linking stuff
is ridiculous when you use a mircocontroller where you have to use static linking.
Therefore I use MPL so I still can profit from changes made to my code,
but other can use it how they want as long as they don't change it.
All the files can be obtained here : https://github.com/LongHairedHacker/avr-lc7981/
If you need the (not supported and not maintained) GPL Version or the latest development version use git to clone the repo and go back. I would not recommend using the GPL version, it has some ugly bugs.
If you have any questions feel free to ask using my mail adress, that can be found in the source code.
Have fun with your display!
Edmundo: (29.8.2011 9:44:48)
Thanks, I´m professor in the "INSTITUO POLITECNICO > NACIONAL" at MEXICO, just all the info my students needs to start. Very grateful.
Good information , very complete. Thanks again
Jesus Palomo: (11.9.2011 2:15:54)
Published: 12.04.2010 16:47Hi, I am student in the "Instituto Tecnologico de Toluca" at Mexico, you program and library very well, I compile in AVR Studio and worked well, Thanks for you info and post...Greetings from México