Perfect PETG bridges
PETG is a nice material for robust mechanical parts, it's easy to print, does not require a heated enclosure, does not smell, and still produces strong parts with that deform plastically rather than shatter immediately. Plus it last quite some time exposed to the elements outside. However, it also hardly shrinks when cooling. This means unlike ABS or PLA, where bridges tend to tension themselves while cooling, in PETG your saggy bridges will stay saggy. There has been a well known technique for a couple of years now, using PLA as support on PETG 3D-prints, to work around this. It makes sense because the two won't stick to each other, so you can just spam supports almost everywhere, and they'll peel off nicely.
The downside to this is you'll need a fancy printer, with at least dual material capabilities. I don't have one of those. On the other hand I really like my Chaos Inkl. Printer. It's a modified MendelMax 1.5, we build about 20 of them, so I know all the quirks. Over the last 10 years I spent a lot of time fixing and improving it. It's still working fine for me.

Recently I needed to print some din rail adapters for a (yet undisclosed) project at the HAM Radio Research Group. The slot for the mounting tap requires some long bridges. Usually I'd just use support for the long bridges, and clean them up with a file, or flip the part upside down and use my hot air station to melt them in place.
Unfortunately in this case, that won't work.
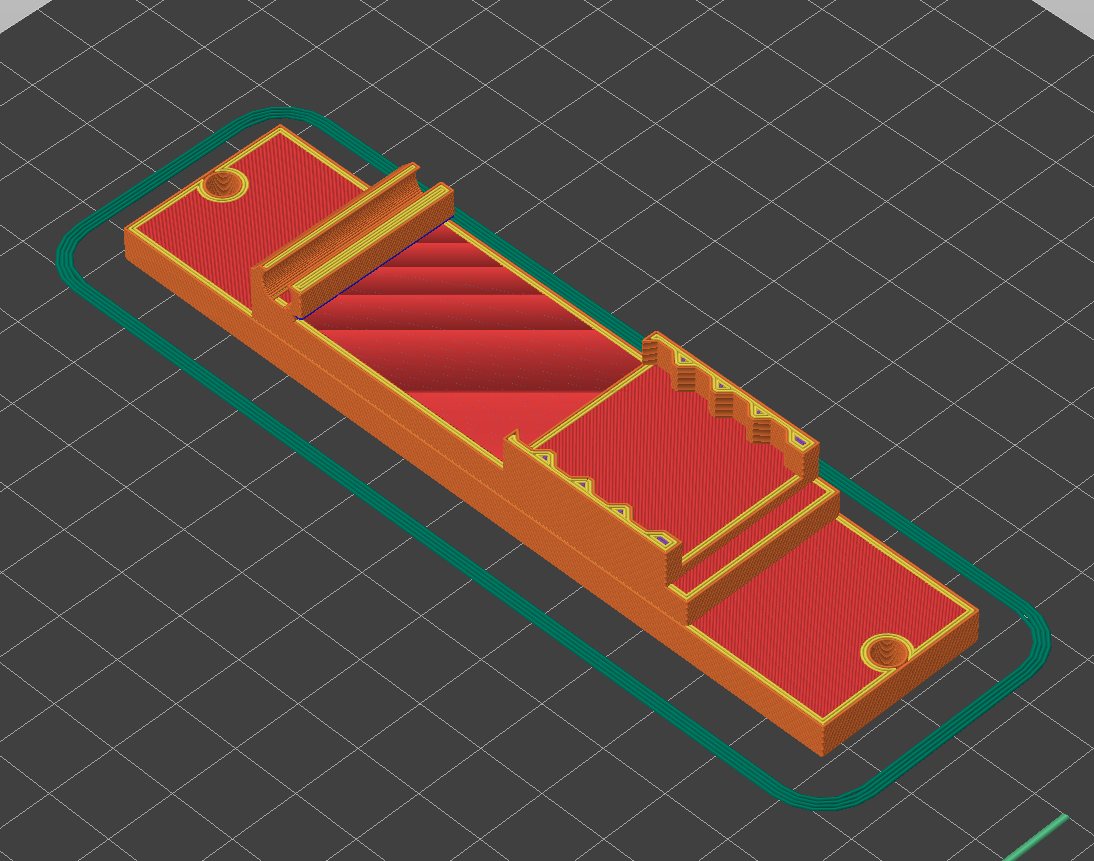
There is some internal geometry inside that slot, that would make the support material a real pain to remove.
However, due to the nature of the part, it should be possible to print right up to the layer where the bridges start, pause the print and add some form spacer, before printing the bridges. After the print is done, the spacer can be pulled out. That is unless it fuses with the print.
I modelled a simple part with similar dimensions (minus 0.2mm here and there for tolerance) to the tab, directly in PrusaSlicer.
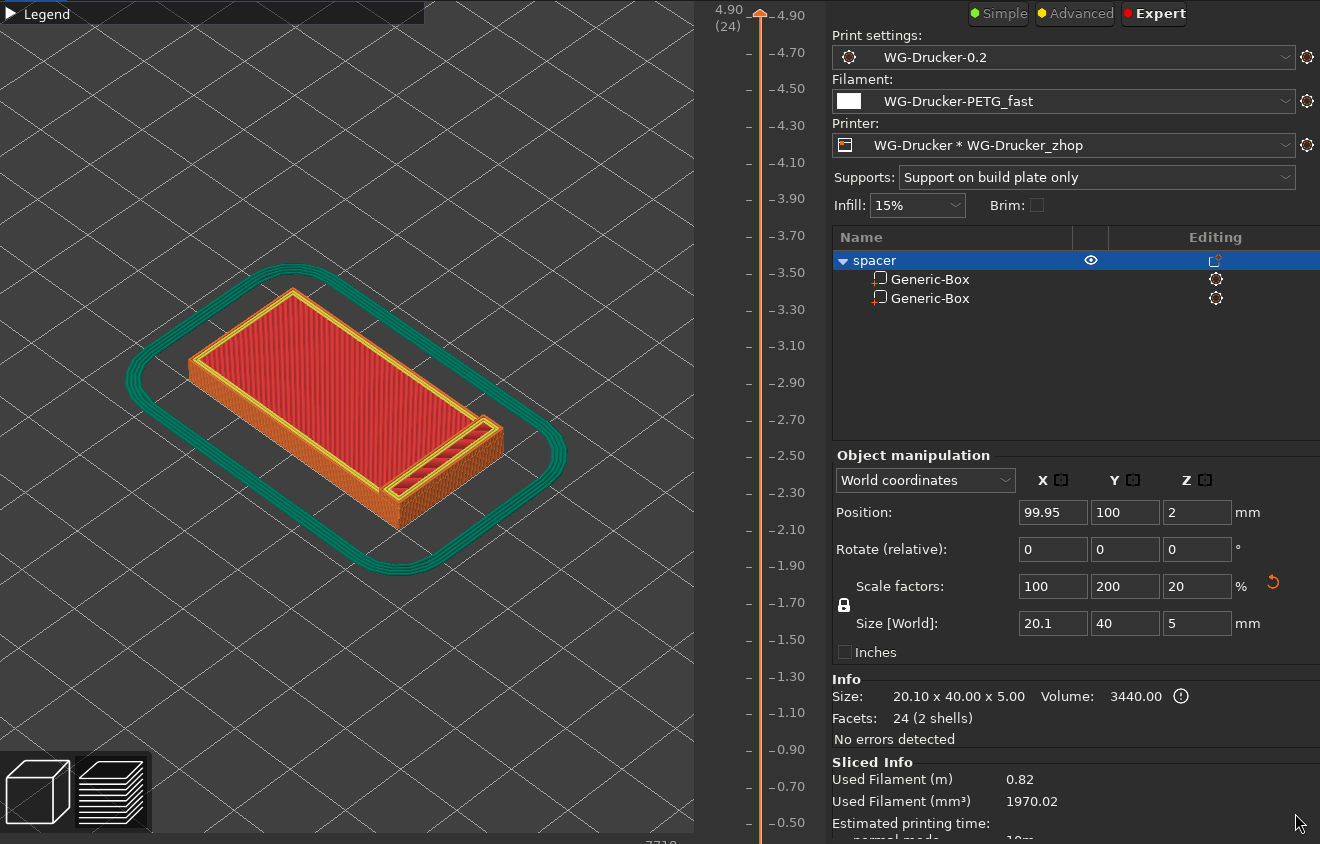
So the initial idea was to print in PLA for that. That involves switching filament, and since I mostly print PETG, thoroughly cleaning the nozzle to avoid clogging. It would be a lot more convenient to print the spacer in PETG and add some surface treatment, to prevent it from fusing with the bridges. After rummaging around the workbench if found a roll of Koptan(sic!) tape, that should be sufficiently non-stick and heat-resistant.

That only leaves the issue io pausing the print at exactly the right layer.
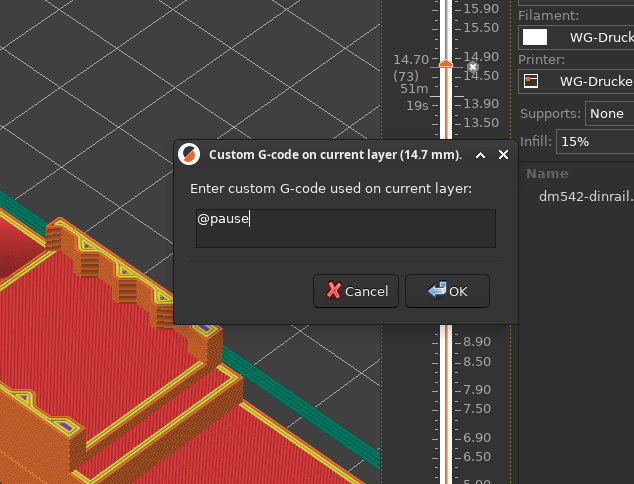
In my case that was simple since I'm using OctoPrint.
Scroll the layer marker thingy up to the layer just before the bridges start,
and right-click the hexagon next to it.
Chose custom g-code and simply enter @pause.
Since the @command is interpreted by OctoPrint, it should work pretty much regardless of the printer.
(That is provided you set the necessary gcode scripts.)
Once the printer has paused, the spacer can be put into place and resume the job.

Unless you hit the tolerances exactly right, the first layer on the tape will look weird.
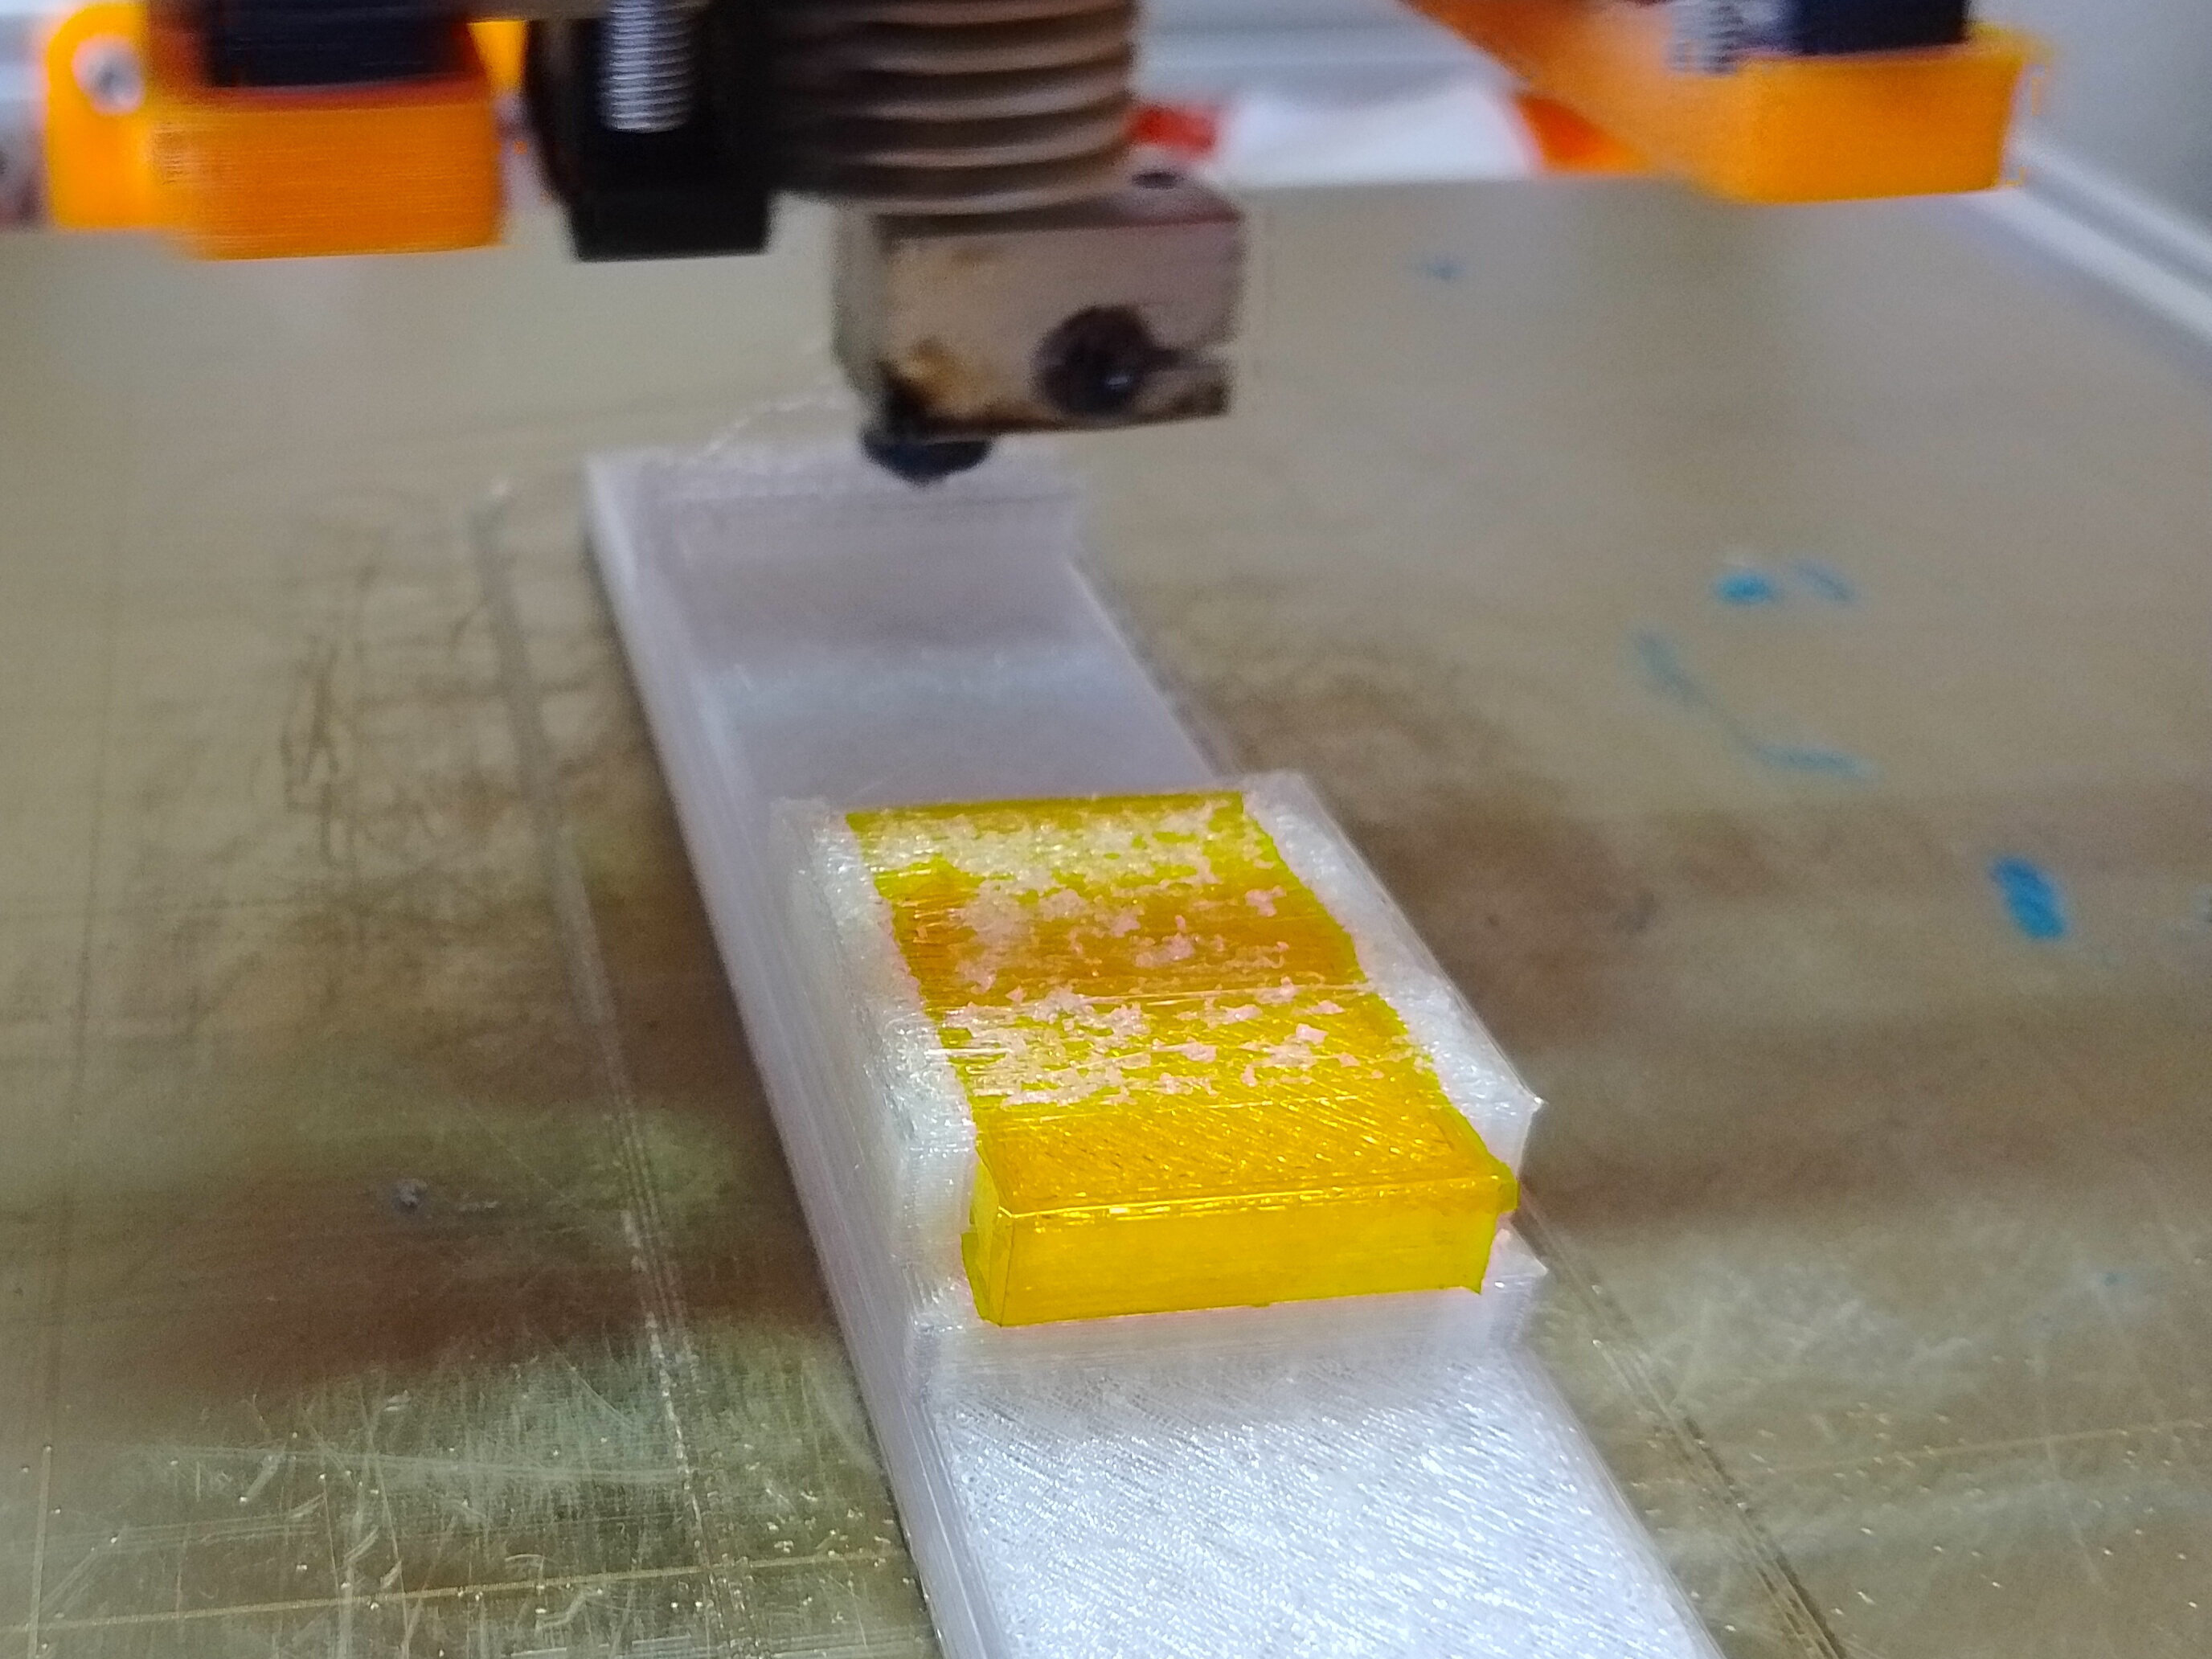
The next few layers will look a lot better.
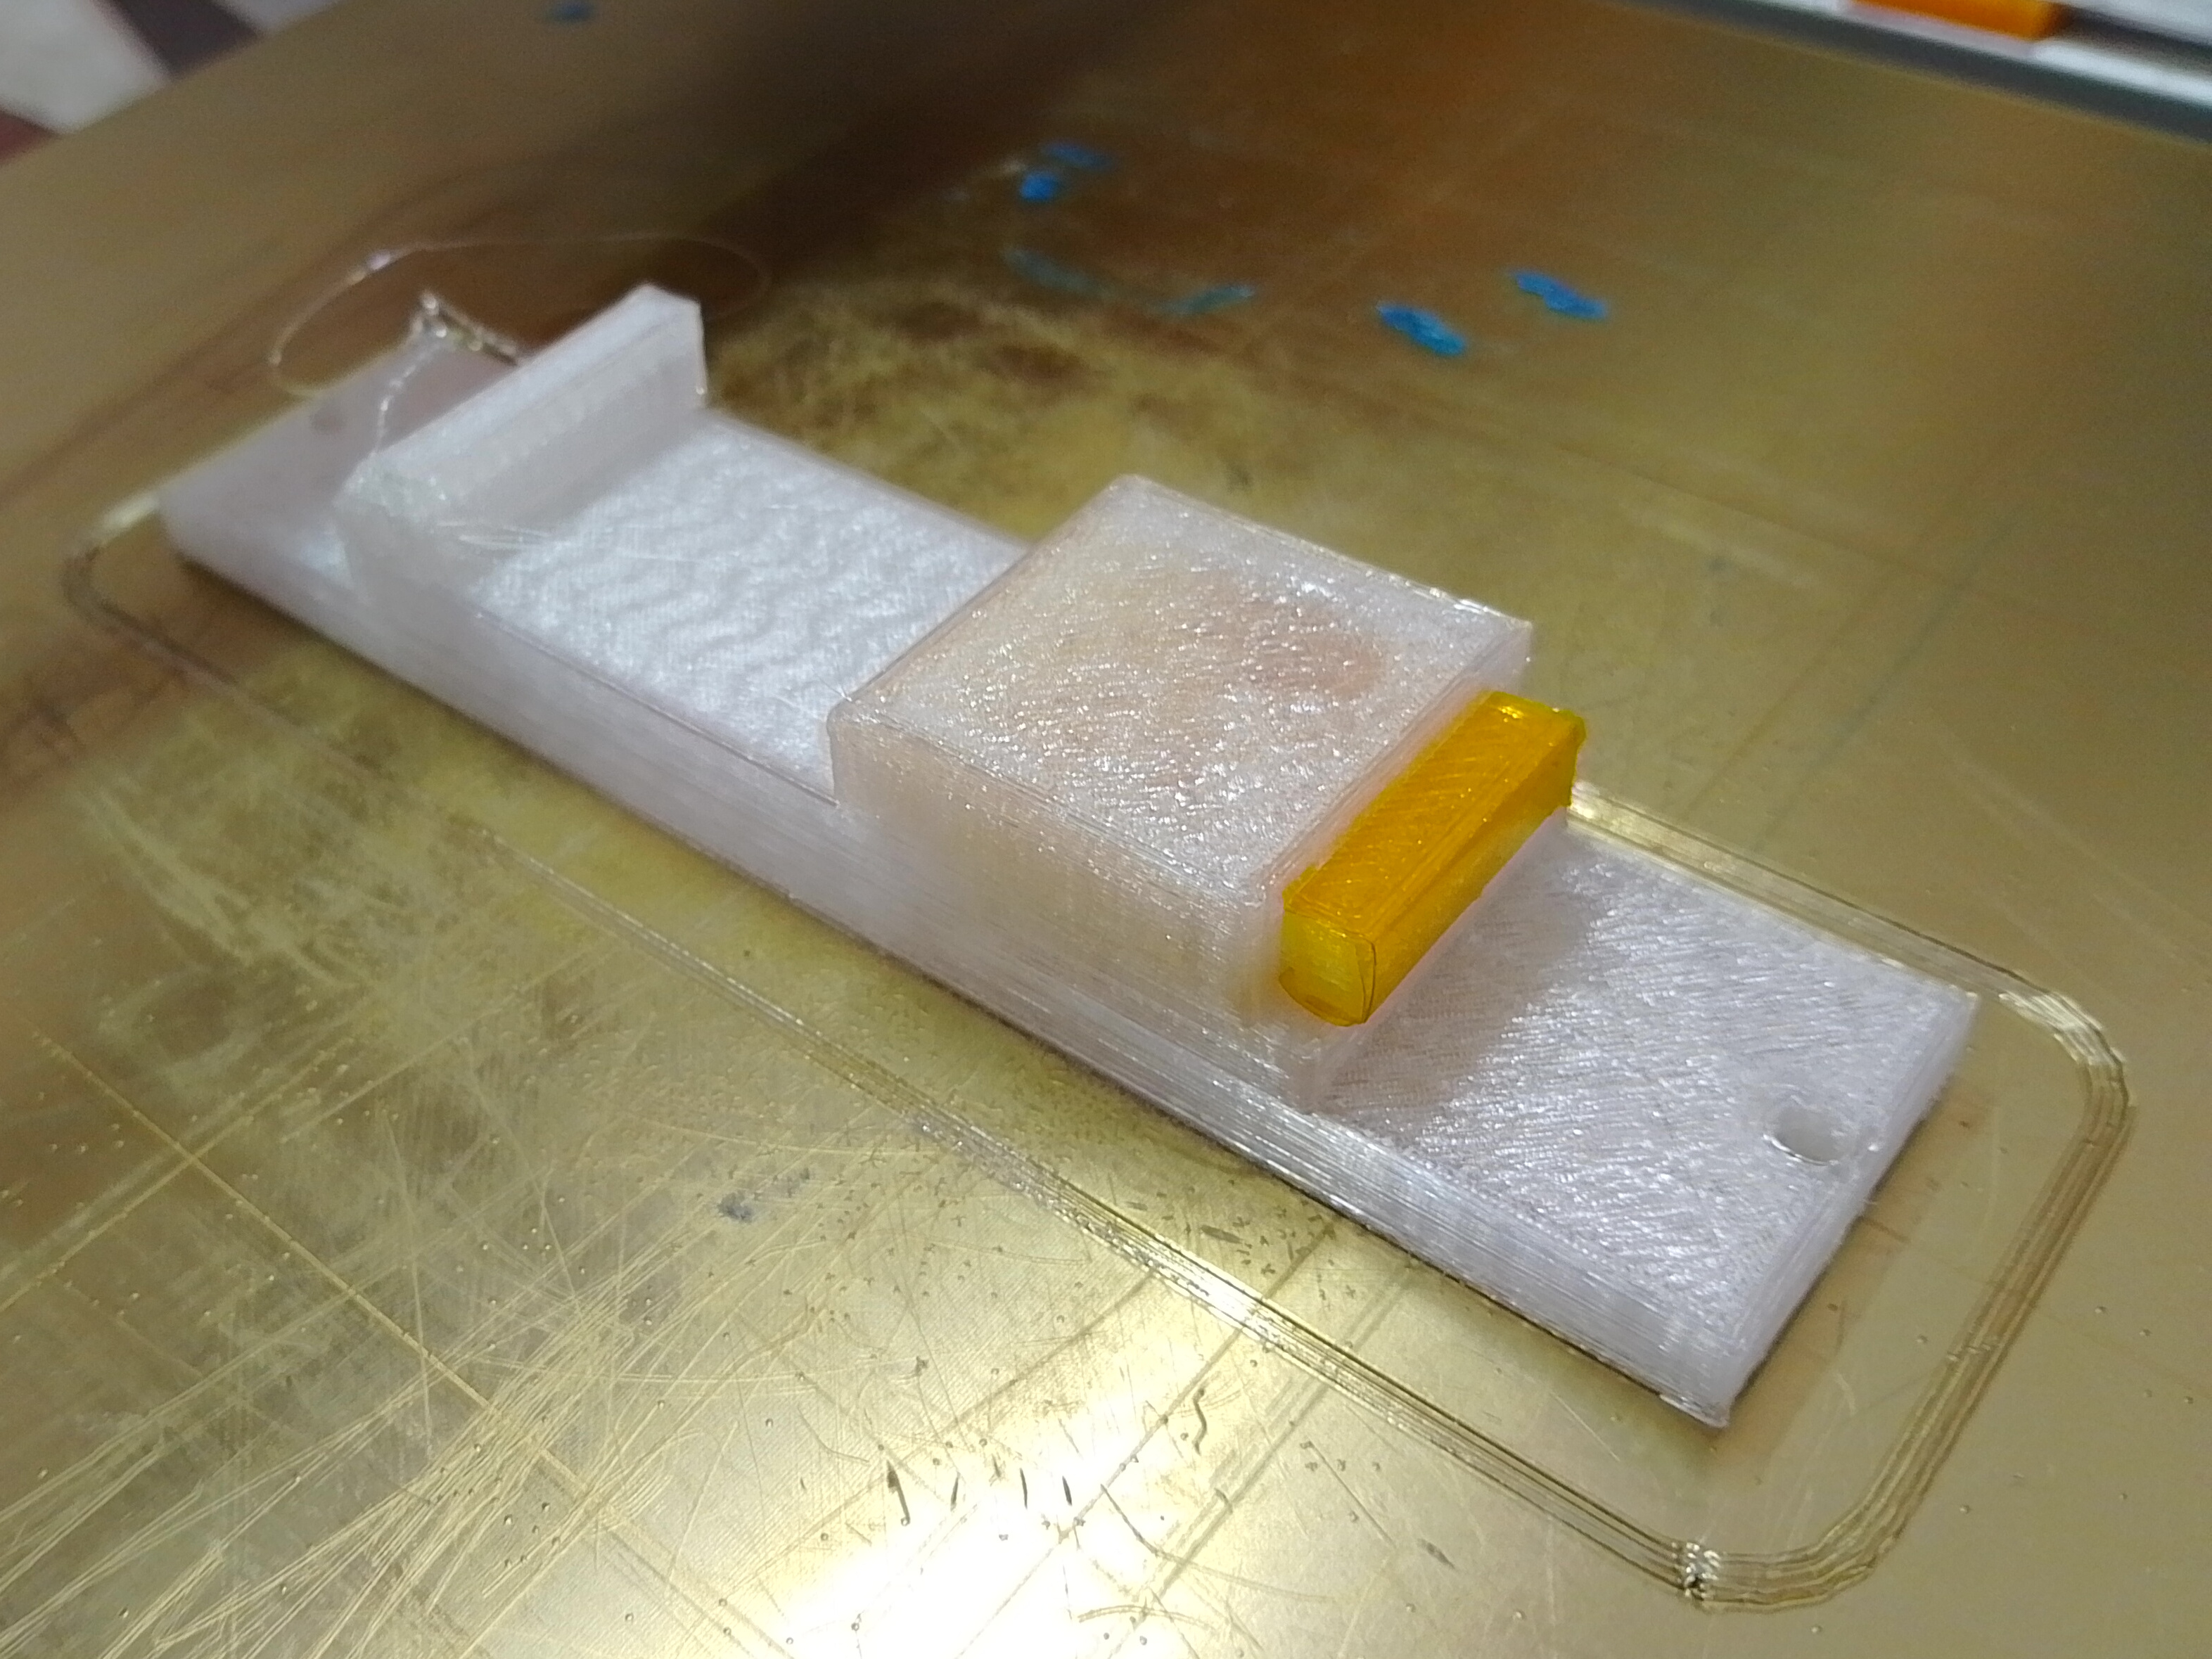
Once the print has finished the spacer can be pushed out with a screwdriver. Depending on the tolerances it might require a few gentle taps with a hammer.
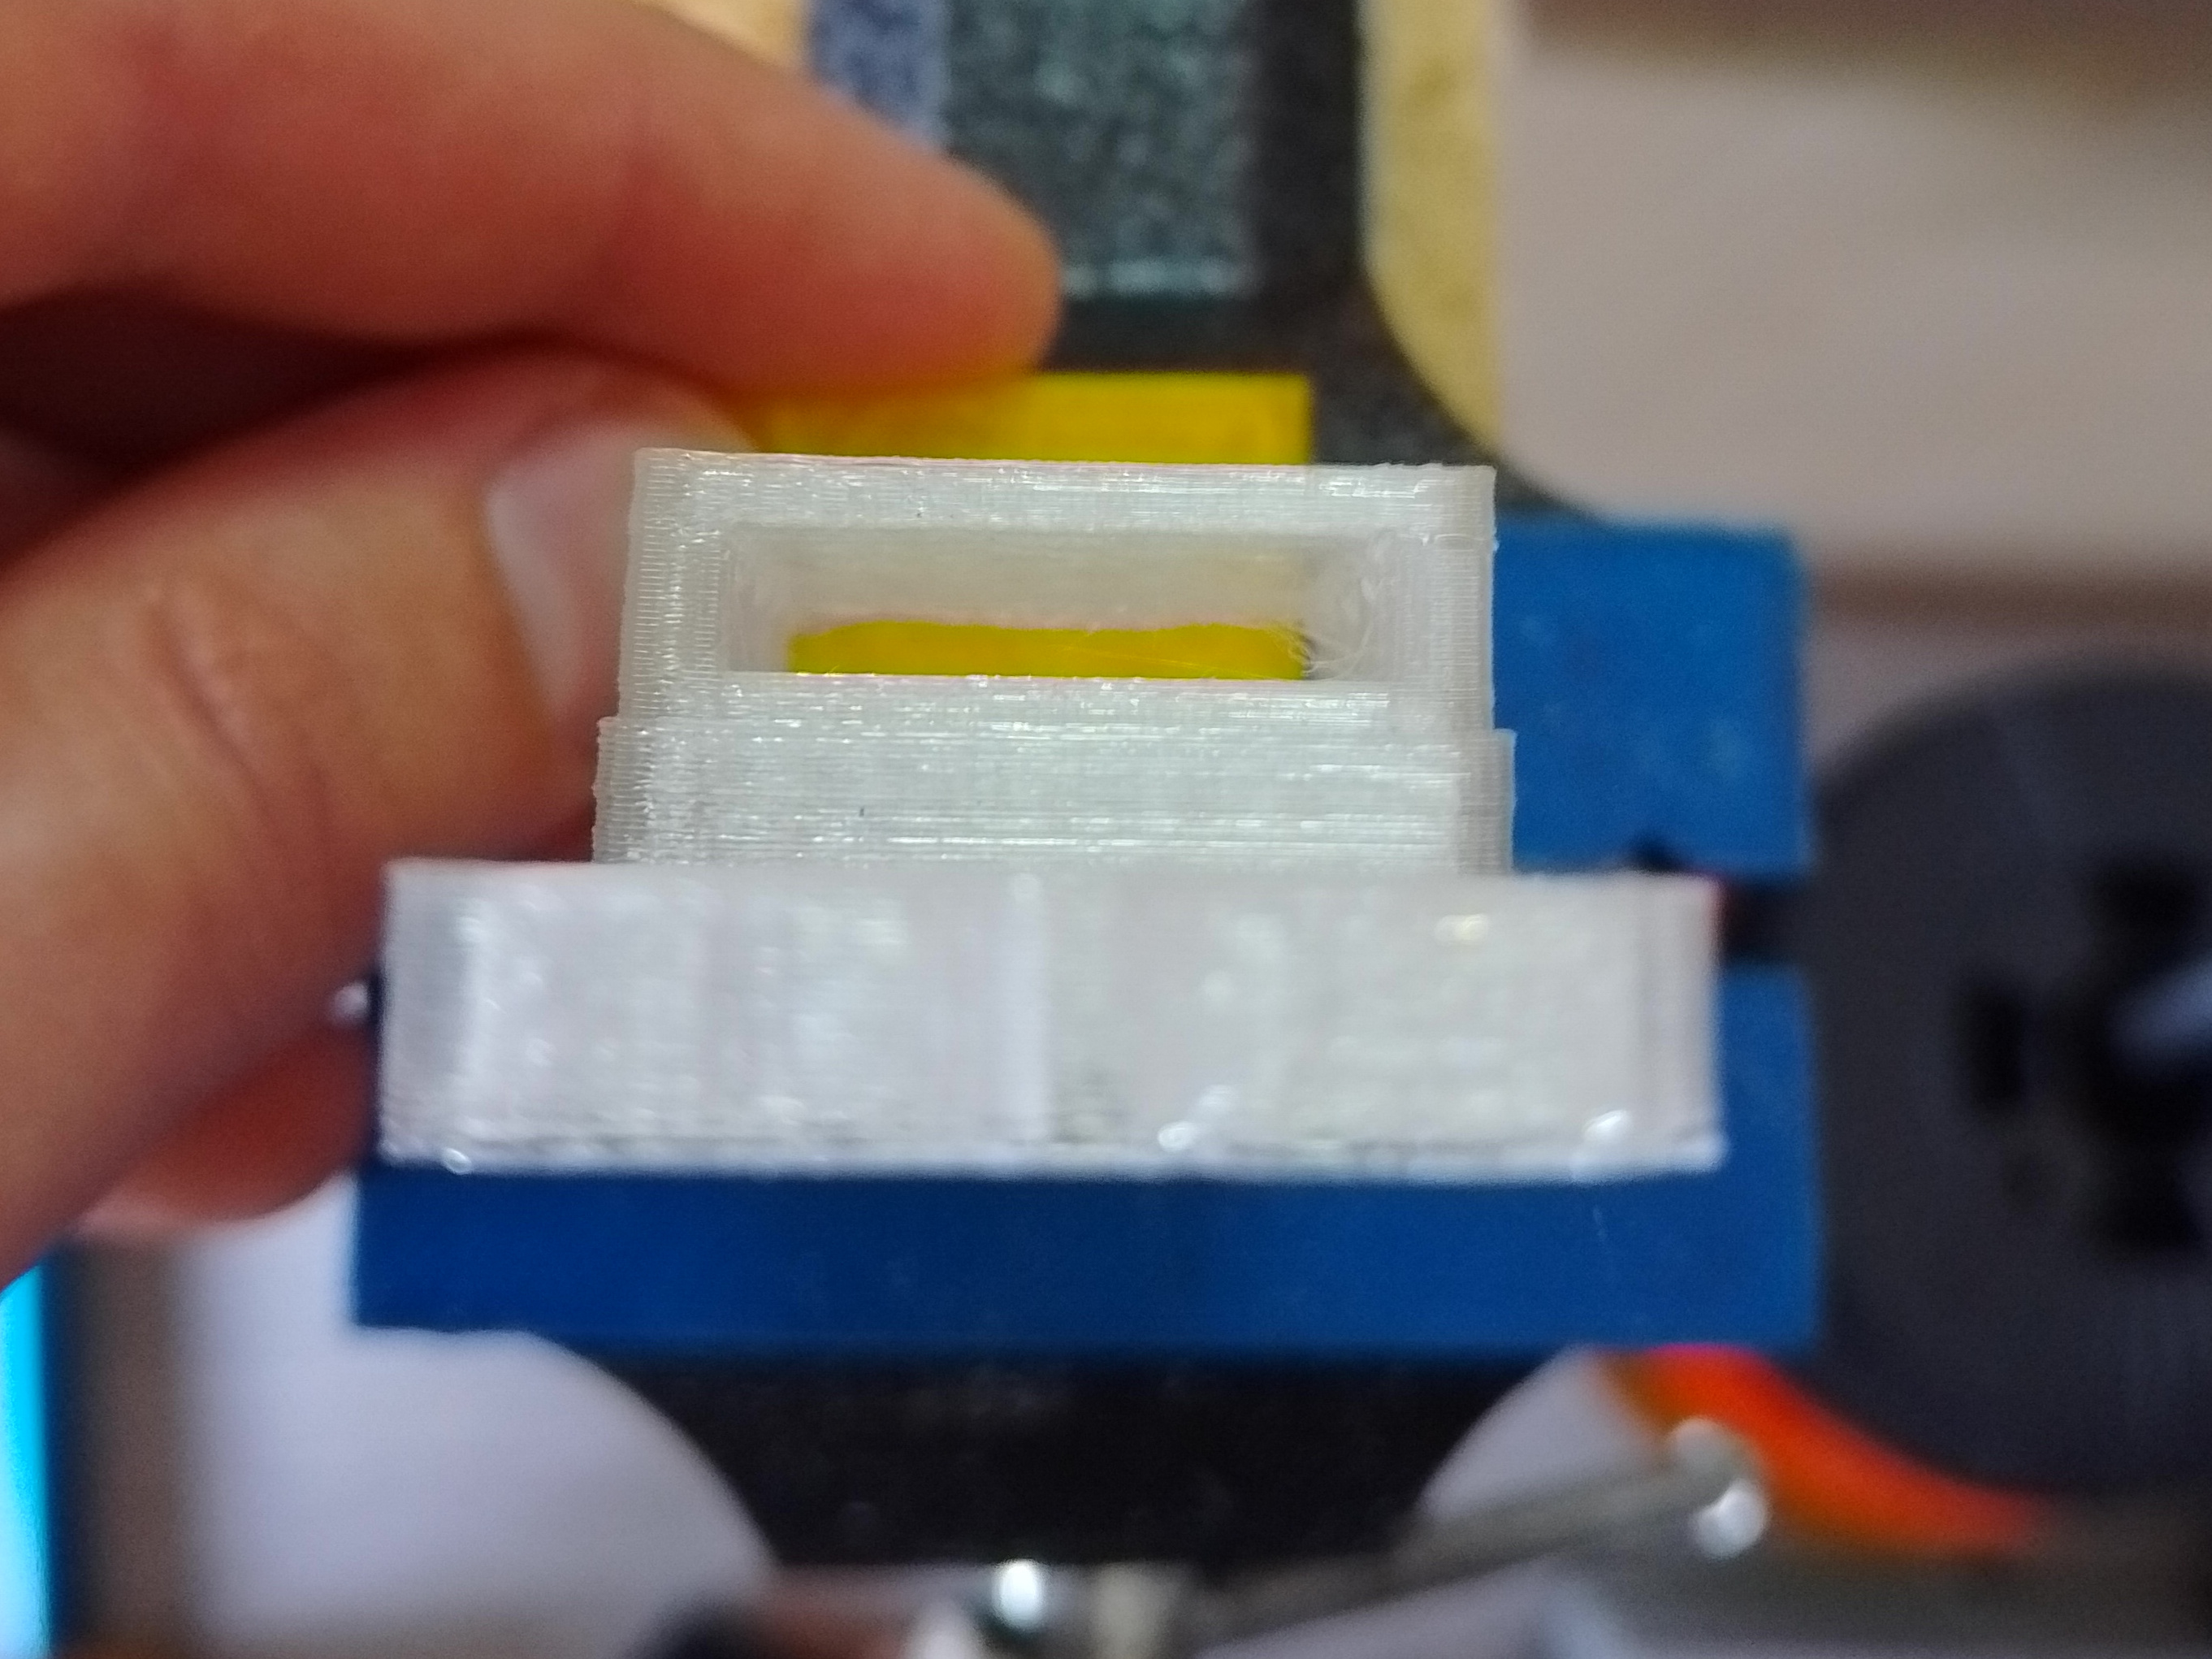
Unfortunately the inside top surface is hard to photograph, but by the power of printing spares and breaking one of them, we can get a better look.
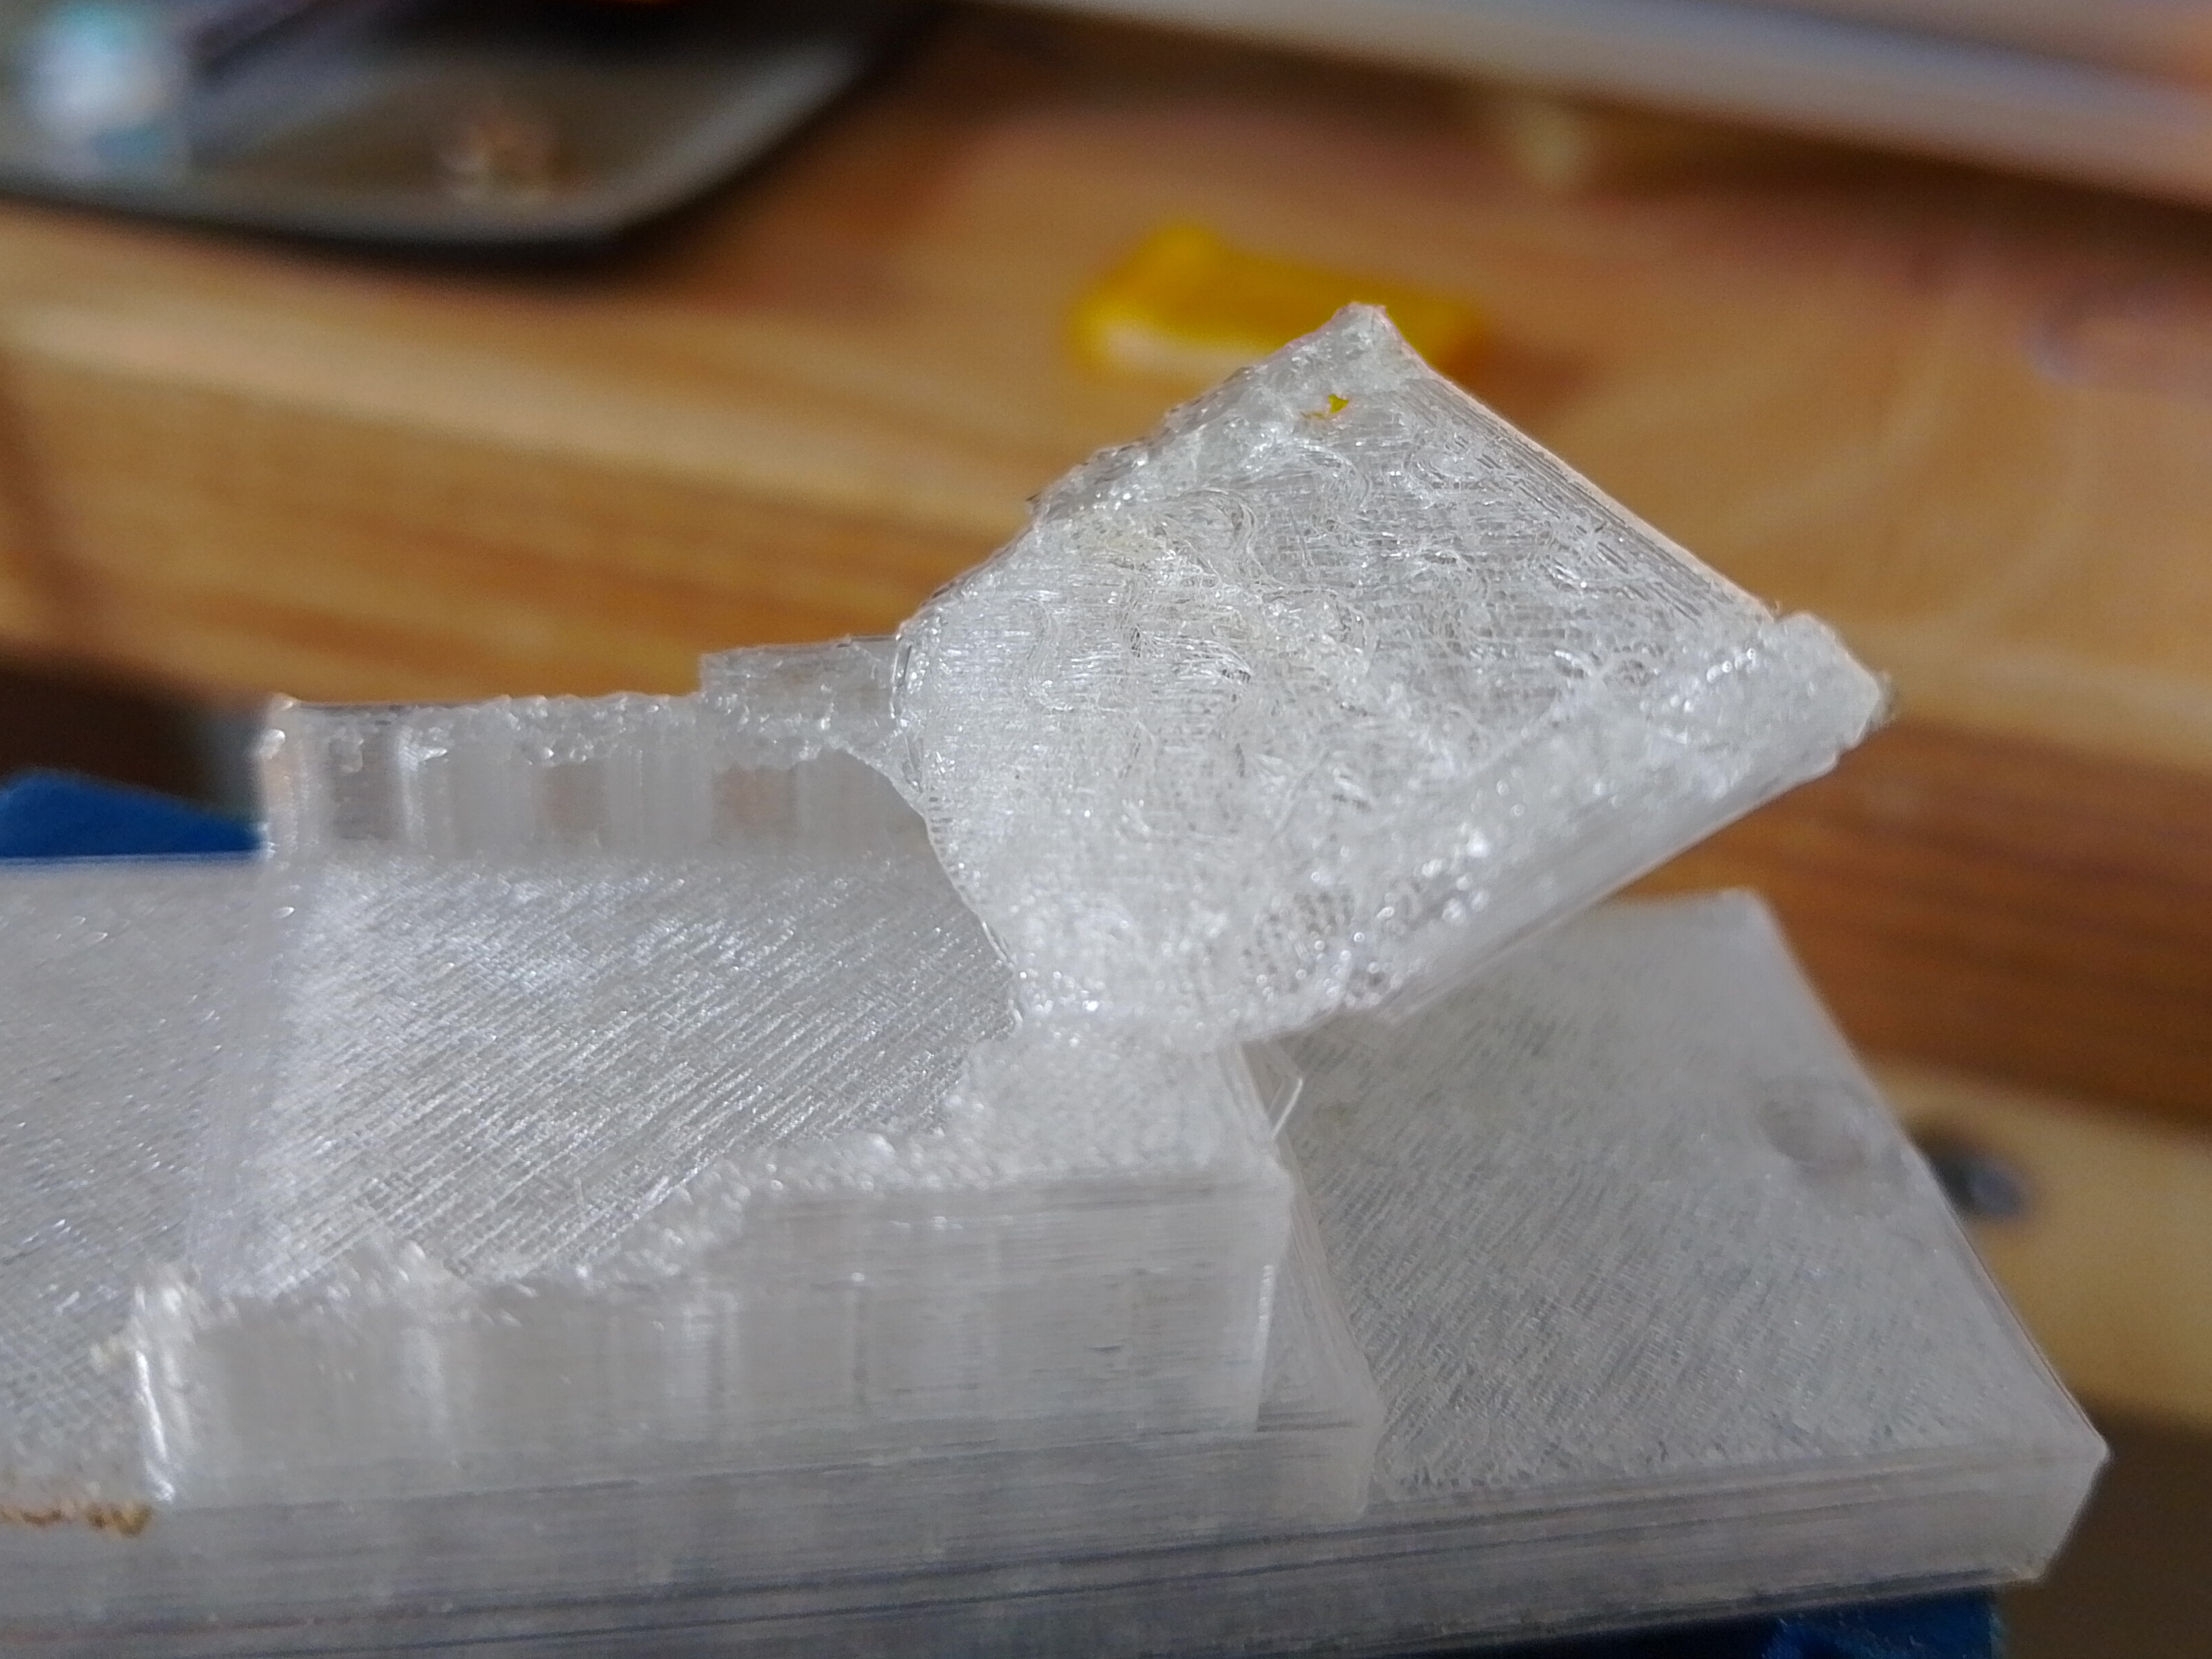
The part surface is almost as smooth as something printed directly on the bed. On my personal scale, that's pretty much perfect for a PETG part.
Of course this won't work for all shapes. If the spacer can not be pulled or pushed out due to its shape, or if there is not enough clearance to pull it out, you still have a problem. However, for those shapes you'd probably want water-soluble supports anyway, because it would be hard to remove supports mechanically (unless you have access to more than 3 dimensions in your workshop).
Other than this trick should give you very clean bridges in PETG even on an older machine.
For comments you can use your fediverse account to reply to this toot.
Published: 14.04.2024 15:00 Updated: 15.04.2024 11:05
